Contribute to the DSpace Development Fund
The newly established DSpace Development Fund supports the development of new features prioritized by DSpace Governance. For a list of planned features see the fund wiki page.
Overview
Step 1: Login using your credentials

Step 2: Go to the Item you want to edit
Users can reach an item through multiple methods, as listed below:
- Search an item
- Browse communities and collections
- Finding an item in the Administration section at Edit > Item
Click the "Edit" button on the item title's right-hand side.

Step 3: Click the "Authorizations" button under the "Status" tab to manage the Item's authorization policies.

Users can create different policies for both Item and bitstreams. These are:
Managing ADD/REMOVE/READ/WRITE policies for an item
Managing READ/WRITE policies for a bitstream
Add Authorization Policy
Step 1: Click the "Add" button to create a new resource policy for the Item.

Step 2: Users can populate information on the "Create new resource policy" page about the policy and click on the "submit" button. Please see the description of each field followed by the below screenshot.

- Name: Enter Policy name.
- Description: Enter the Policy description for future reference and understanding of other users.
- Select the policy type: The user can select one of the following policy types:
- TYPE_SUBMISSION: a policy in place during the submission
- TYPE_WORKFLOW: a policy in place during the approval workflow
- TYPE_INHERITED: a policy that has been inherited from a container (the collection)
- TYPE_CUSTOM: a policy defined by the user during the submission or workflow phase
- null: if the information is not available
- Select the action type: The user can select one of the following actions from the drop-down list:
- READ
- WRITE
- ADD
- REMOVE
- ADMIN
- DELETE
- WITHDRAWN_READ
- DEFAULT_BITSTREAM_READ
- DEFAULT_ITEM_READ
- Start date – end date: The user can select a start date and end date for using the policy, should they want to apply it for a fixed period.
- The eperson or group granted the permission is the list of users/groups granted authorization under the policy.
- Search for an ePerson / Search for a group: Click on the "ePerson" or "group" to search for the entity.
- Search field: Enter keywords for searching the ePerson/Group.
- ePerson/Group list: Click on the select button against the user/group you want to add to the policy
- Submit/Cancel button: Click on the "Submit" button to complete policy creation or click on the Cancel button to cancel the entire process.
As shown below, users will see a success prompt upon the policy creation and be back on the Manage Policies screen.
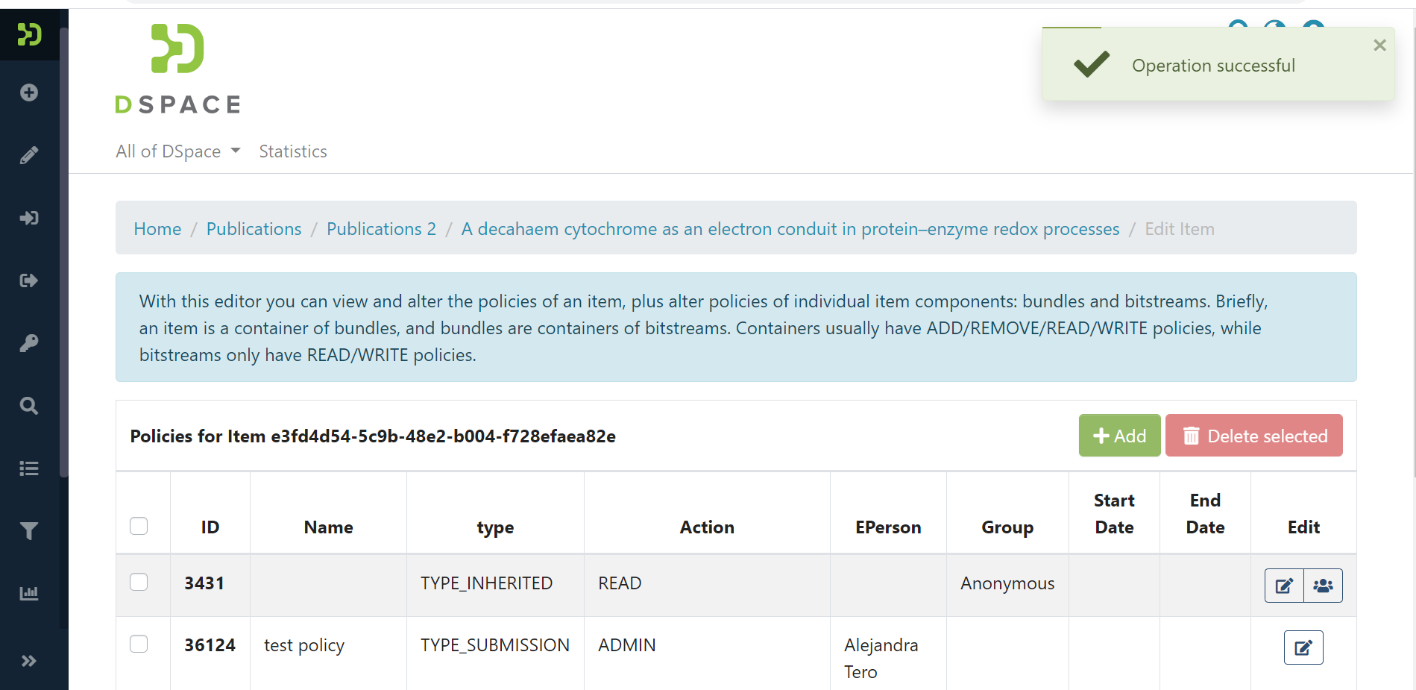
Manage Policy
Step 1: Click on the Edit policy icon appearing against each policy to update it.
The user group button next to the Edit policy icon will take users to the user group management. Please refer concerned section for more details.

Step 2: Update policy information on the "Edit resource policy" page and click on the "Submit" button. Please see the description of each field appearing on the "Edit resource policy" page after the screenshot.
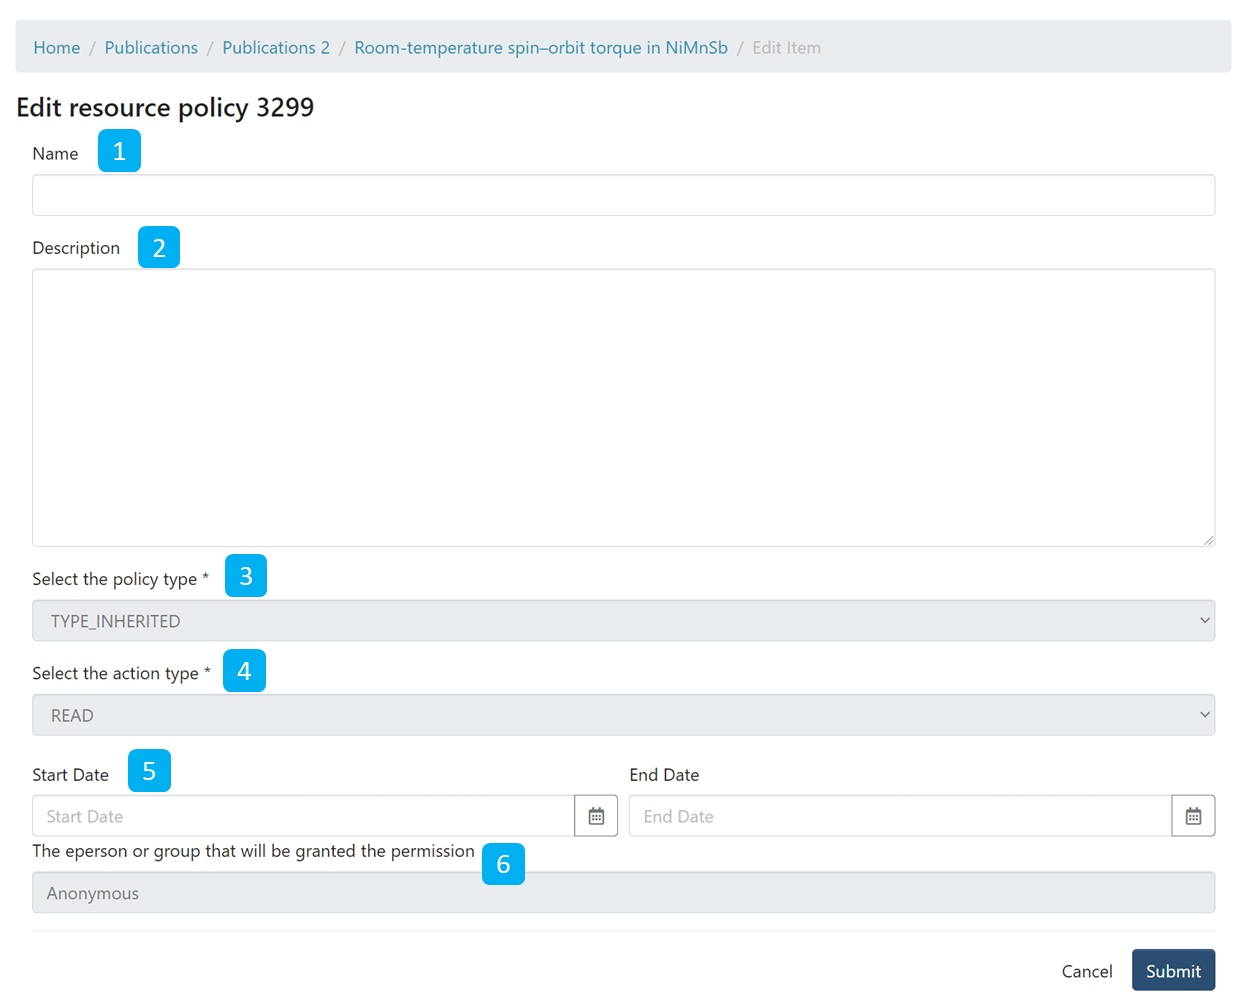
- Name: Enter Policy name.
- Description: Enter the Policy description for future reference and understanding of other users.
- Select the policy type: The user can select one of the following policy types:
- TYPE_SUBMISSION: a policy in place during the submission
- TYPE_WORKFLOW: a policy in place during the approval workflow
- TYPE_INHERITED: a policy that has been inherited from a container (the collection)
- TYPE_CUSTOM: a policy defined by the user during the submission or workflow phase
- null: if the information is not available
- Select the action type: The user can select one of the following actions from the drop-down list:
- READ
- WRITE
- ADD
- REMOVE
- ADMIN
- DELETE
- WITHDRAWN_READ
- DEFAULT_BITSTREAM_READ
- DEFAULT_ITEM_READ
- Start date – end date: The user can select a start date and end date for using the policy, should they want to apply it for a fixed period.
- The eperson or group granted the permission is the list of users/groups granted authorization under the policy.
- Search for an ePerson / Search for a group: Click on the "ePerson" or "group" to search for the entity.
- Search field: Enter keywords for searching the ePerson/Group.
- ePerson/Group list: Click on the select button against the user/group you want to add to the policy
- Submit/Cancel button: Click on the "Submit" button to complete policy creation or click on the Cancel button to cancel the entire process.
As shown below, users will see a success prompt upon the policy creation and be back on the Manage Policies screen.

Delete Policy
Step 1: Click on the check box on the left-hand side of each policy, and the "Delete Selected" button will be activated.
Step 2: Click the "Delete selected" button to delete the policy. Please note that deleted policy is irrecoverable.
You'll see success prompt upon deletion of the selected policy.
Overview
Content Tools
All content on the LYRASIS Wiki is licensed under the CC BY (Attribution) license![]() , unless otherwise noted.
, unless otherwise noted.