Contribute to the DSpace Development Fund
The newly established DSpace Development Fund supports the development of new features prioritized by DSpace Governance. For a list of planned features see the fund wiki page.
Audience
- Repository Administrator
- Community Administrator
Edit Community
Step 1: Login using your credentials
Step 2: There are multiple ways to start editing a community. One of them is by going to the target community and clicking on the Edit button, the button with the pencil icon, beside the page title. Alternatively, follow the steps provided here.
Rollover cursor on the pencil icon in the admin menu.

Step 3: Click on “Edit” and click on “Community” to proceed with the edit community process.


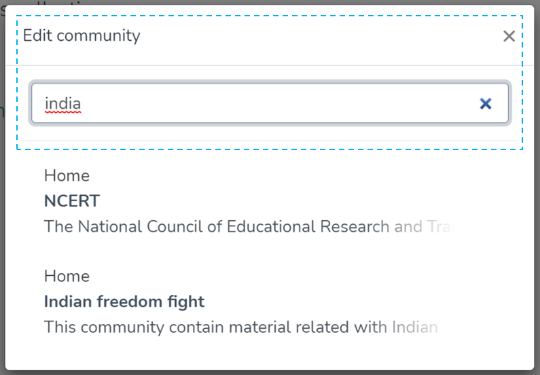
Step 4: A popup showing a list of the communities in the DSpace and a search box will appear. If you are already on the page of the community, it will appear at the top of the list, so you can select it by clicking on it. Otherwise, type the name of the community you want to edit in the search field. Upon typing a few letters of the community’s name, a list of the community(ies) having those word(s) will appear. Click on the target community to initiate editing.
The application will take the user to the edit community form to perform various actions to edit the community. Each tab is explained in a separate process in this document.

- Delete this community – The button provided for deleting the community. Detailed steps are explained in the latter part of this page.
- Tabs – Edit community has a variety of functions, which are grouped logically across various tabs. Below is the summary of these tabs
- Edit Metadata – Tab covers activities related to editing the community’s profile information.
- Assign Roles – This tab allows users to create specific roles for the community, usually, the role of Administrator of the community, see further detail below.
- Curate – Users can set up various workflows related to content curation in this tab
- Authorizations – Under this tab, users can manage various groups and their different access rights in the community, for example, this tab could be used to grant an individual the administrator role, see further detail below.
Edit Metadata
The Edit Metadata tab allows users to update the community’s profile-related information, a.k.a. community metadata.
Various actions on this tab are explained immediately after the Edit Metadata illustration is added below.

- Community logo – Click on the delete button to remove the existing logo. If no logo exists, then a widget allowing the user to add a logo is displayed here.
- Name – Update the existing community’s name in this field.
- Introduction text (HTML) – Update introductory text if already added or can add new text. One can utilize HTML tags to format the text or continue entering plain text content.
- Short Description – Update the description of the community or add a fresh short description for the community.
- Copyright text (HTML) – Update copyright-related information in this field. This is usually displayed at the foot of the community landing page. Fields marked with (HTML) support HTML tags-based formatting.
- News (HTML) – Add/Update news specific to this community in the field. This is usually displayed with the heading ‘News’, underneath the community’s introductory text, and above the list of collections and sub-communities.
- Action Button – Clicking on the Save button will update the metadata information for the community.
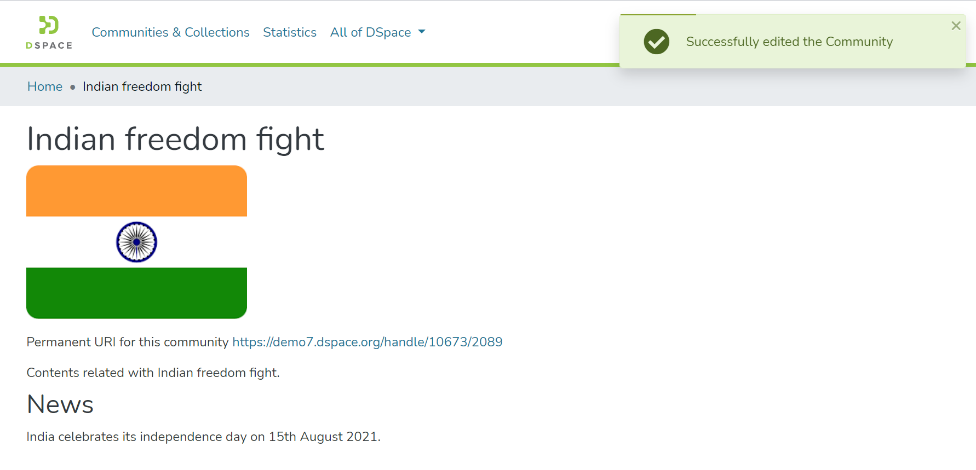
Click on the ‘Save’ button to save the information updated in the ‘Edit Community’ tab. A success prompt will appear, confirming the successful edit of the community.
Assign Roles
This tab allows authorized users to create a Community administrator role. Click on the “create” button to assign a community administrator role.
The roles available on this tab are explained below this illustration.

Administrators - Community administrators can create and manage sub-communities and collections. This user profile can also assign rights to edit item metadata and map existing items from other collections.
Curate
This tab provides various workflows for curating items stored in the community. Below are standard flows, and there can be customized curation workflows as well
- Profile bitstream formats
- Check for Required Metadata
- Check Links in Metadata
Users must select a workflow from the dropdown list and click the “Start” button to initiate the curation process.

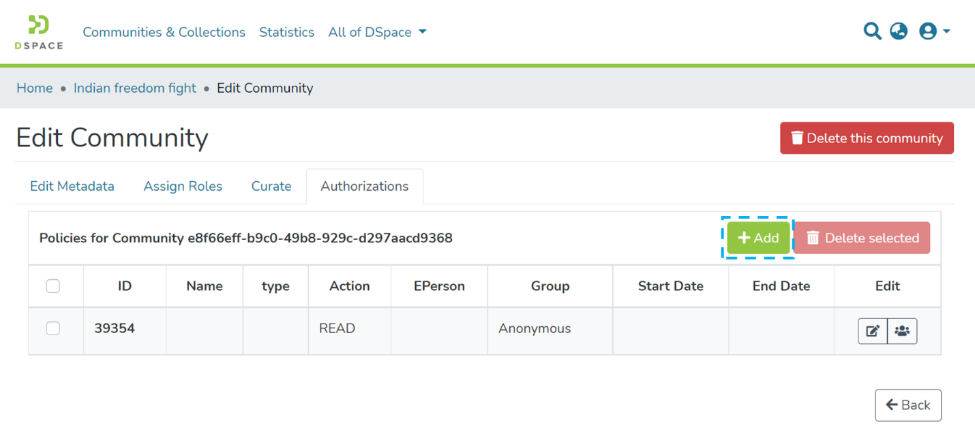
Authorizations
Users can view and edit community resource policies defined for the community, in the Authorizations tab. Users can create policies in addition to the standard policies created from the Assign Roles tab. Following are the key actions in this tab.
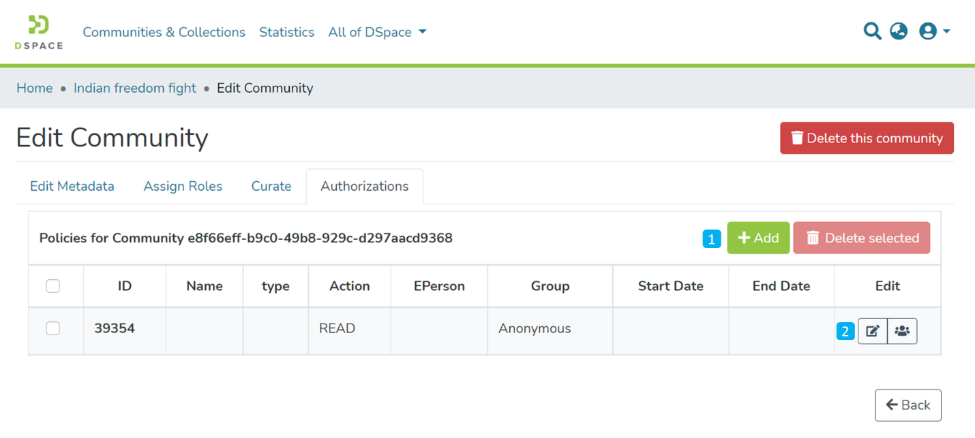
- Manage Policies
– Click on the Add button to create a new resource policy or select policies from the table, see further detail below.
- Alternatively, click on the Delete selected button for a batch deletion of the policies. - Edit policy and members in a policy – Click on the edit button to edit an individual policy or click on the group icon to edit the user group eg to add or remove individual ePersons.
Click on Add button to create a new Authorization policy
Overview
Content Tools
All content on the LYRASIS Wiki is licensed under the CC BY (Attribution) license![]() , unless otherwise noted.
, unless otherwise noted.