...
In the Create Form dialogue enter a form name - for example we are creating a basic OAI DC form so a name like oai_dc_basic would be appropriate. If you have an existing XML Form Builder form you could upload the form definition. We’ll be creating this OAI DC XML form from scratch, so we can click on Create.
 Image Removed
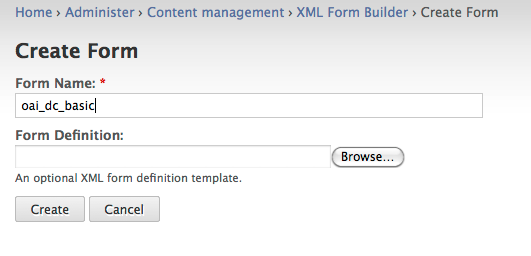 Image Added
The module should report that it successfully created a new form called oai_dc_basic.
 Image Added Image Removed
This is the main form building/editing interface for creating XML forms and it provides methods for adding form properties, form fields and a preview pane.
Setting Form Properties
 Image Added Image Removed
When creating an XML form the first thing you need to set in the Form Editor is the Form Properties. This is where having an example of an OAI DC record would come in handy and would provide the information you need to fill in the Form Properties. Here is the part of the record that you’ll use:
...
It provides information about the Root Element Name, the Namespace URI, the location of the Schema, as well as the various namespaces needed.
 Image Added Image Removed
Select Save once you have the properties entered. Once the form properties have been entered you are ready to add elements to your form.
...
Required: Indicates whether or not the element is required. This automatically validates for empty fields, and flags inputs as required. Fields with a type of file are not allowed to be required.
Image Removed Image Added
The rest of the form deals with where each element is created, read, updated, and deleted in the XML tree. This is where it would be useful to understand how XML works and to have a basic understanding of XPATH.
...
- Create action is about selecting the parent node where the new node will be created.
 Image Added Image Removed
The rest of the form deals with where the element will be read, updated, and/or deleted from.
...
| Info |
|---|
Note: You can Update or Delete nodes other than the node which is Read - For example with mods:name … where sub-elements are created with a form field and additional nodes are automatically created with XML code. We may want to delete/update the entire mods:name and its sub-elements. |
Image Removed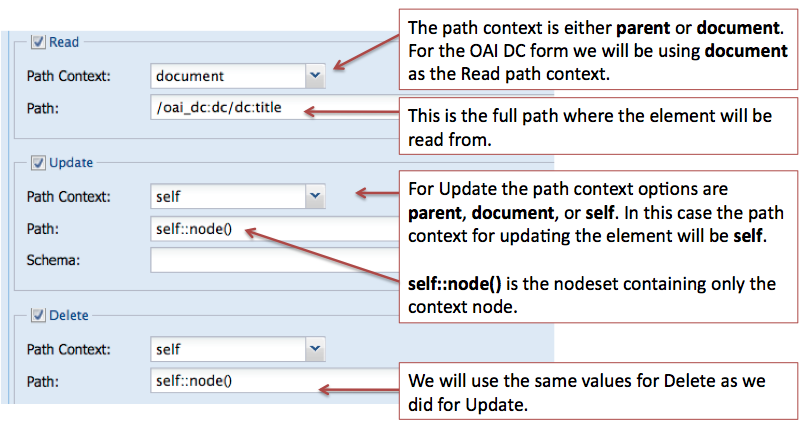 Image Added
Adding the creator element - an element that may have multiple values
...
This image displays the first step of the creation of the creator element.
Image Removed Image Added
The second step is to create a nested tag type element. The image below displays the values for the properties used for this element.
Image Removed Image Added
Adding a textarea type form field - the dc:description element
For element that require a description or that contain a large amount of text, the textarea type form field is used.
Image Removed Image Added
Adding a select type form field - the dc:type element
...
1. When adding information about the element we will use the same method that we have used previously.
Image Removed Image Added
2. To add terms to your select form field you need to click on the More Advanced Controls tab in the Element Form pane. Review the image below and enter your terms in the Options panel.
Image Removed Image Added
Adding a datepicker type form field - the dc:date element
For this example we are using the datepicker type of form field. You will want to review your existing metadata as another type of form field may be more appropriate.
Image Removed Image Added
The remaining two elements for our sample OAI DC XML form, dc:subject (tags, tag) and dc:rights (textarea), can be built in the same manner as fields of a similar type that we have already created.
...
| Note |
|---|
Note: the Identifier for this form field type must be ingest-file-location. |
 Image Added Image Removed
Image Removed  Image Added
Form Associations Module
...
Administer > Content management > Form Associations
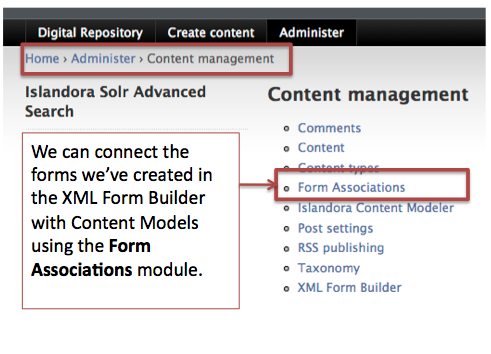 Image Added Image Removed
In this example we will associate the form we created - oai_dc_basic - with the islandora:sp_strict_pdf content model. Review the image below to fill out the Form Associations dialog.
Form Associations Dialog
Image Removed Image Added
Navigating to a Collection
Once the association has been successfully created, you can try ingesting new objects into a collection that has the islandora:sp_strict_pdf content model associated with it. In this case, the Islandora demo VM has a PDF collection associated with the islandora:sp_strict_pdf content model. Navigate to the PDF collection using the image as a guide.
Image Removed Image Added
Once in the collection (you can tell where you are by the breadcrumb), select the Add tab to add a new PDF to the collection.
Adding a PDF to the Collection
 Image Added Image Removed
You will be presented with a dialog requesting two pieces of information: the content model and the form to use for ingest.
...
You will be presented with the form that we created during this tutorial. You’ll need to fill it in. Once you’ve completed your data entry, submit the form.


Image Removed