Page History
...
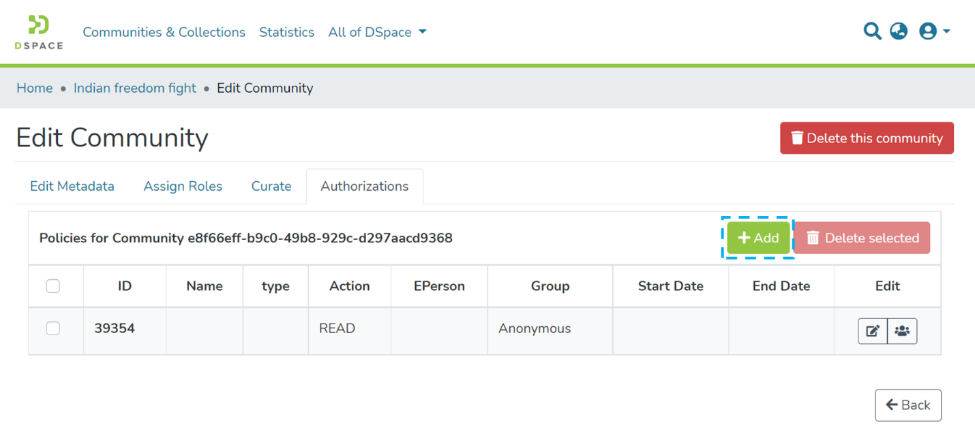
Click on Add button to create a new Authorization policy
Users can enter the information to create the policy and click on the submit button. Please see the description of each field followed by the below screenshot.

- Name: Enter the Policy name in this field.
- Description: Enter the Policy description here for future reference and understanding of other users.
- Select the policy type: The user can select one of the following policy classification types from the list
- TYPE_SUBMISSION: a policy in place during the submission
- TYPE_WORKFLOW: a policy in place during the approval workflow
- TYPE_INHERITED: a policy that has been inherited from a container (the community)
- TYPE_CUSTOM: a policy defined by the user during the submission or workflow phase
- Select the action type: The user can select one of the following actions from the dropdown list. For example, select “READ” to assign read rights to the user or user group.:
- READ
- WRITE
- REMOVE
- ADMIN
- DELETE
- WITHDRAWN_READ (disables item access)
- DEFAULT_BITSTREAM_READ
- DEFAULT_ITEM_READ
- Start date – end date: The user can select the start date and end date of the period for which the policy will be active, should they want to apply this policy for a fixed period only. If the start date is left blank, the policy comes into effect immediately.
- The ePerson or group that will be granted the permission: List of users/groups selected for granting permission under the policy
- Search for an ePerson / Search for a group: Select ePerson or group to add
- Search field: Enter keywords for searching the ePerson/Group
- ePerson/Group list: Click on the select button against the user/group you want to add to the policy
- Submit/Cancel button: Click on the Submit button to complete policy creation or click on the Cancel button to cancel the entire process.
Upon successfully creating the policy, you’ll see a confirmation prompt, and the user will be back on the Authorizations screen.
Overview
Content Tools