Page History
...
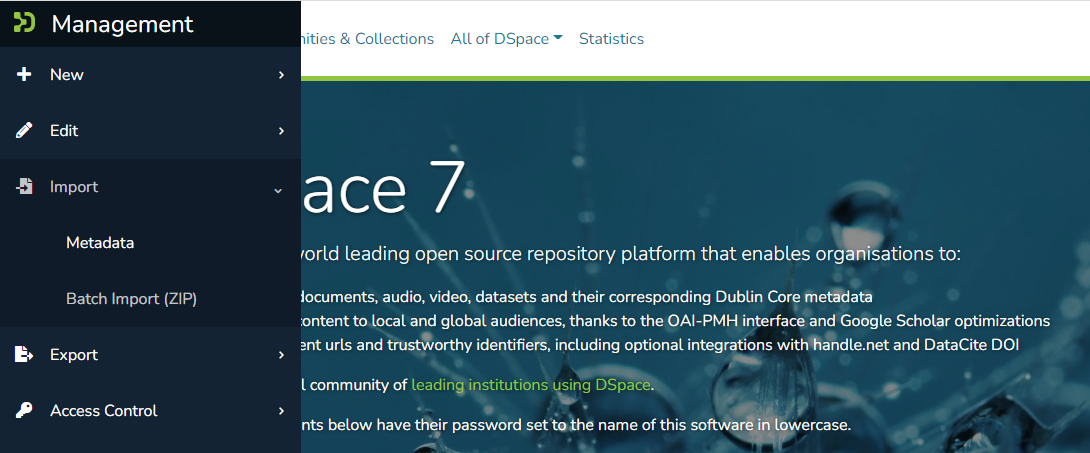
- Login as an Administrator.
- In the side menu, select "Import" → "Batch Import (ZIP)"
- From the "Import Batch" page:
- Select the Collection you are importing into.
- Drag & drop the ZIP file into the drop box (or browse to it on your filesystem).
- Choose whether you want to "Validate Only" or not.
- When selected, DSpace will test the batch import process, but no content will be batch imported. This allows you to validate the results of the import process before doing the import.
- When deselected, DSpace will do the batch import.
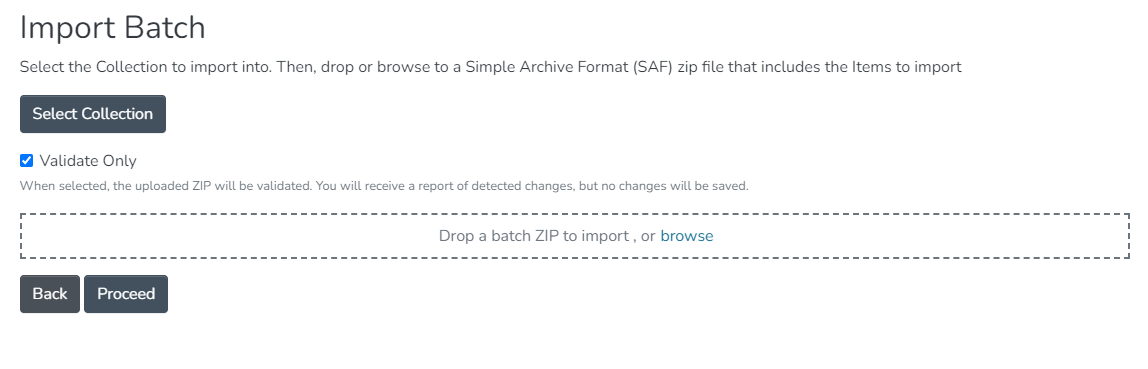
Clicking "Proceed" will start the Batch Import. This creates a new "Process" which begins the upload of the batch. Depending on the size of the batch, this process may take some time to complete. You can refresh to page to see the current status, or go back to the list of processes ("Processes" menu in sidebar) to check on its status. Once the process is COMPLETED, you will see a log of the results and a mapfile (which can be used to make later updates).
- All prior imports will be listed in the "Processes" menu, until their corresponding process entry is deleted. Once you are satisfied with the import and have no need to see the logs or mapfile, you may wish to delete that process entry in order to free up storage space (as your uploaded ZIP will be retained in DSpace until the process is deleted). A "process-cleaner" script can also be started from the "Processes" page which can be used to bulk delete old processes.
| Note |
|---|
It is also possible to start an "import" directly from the "Processes" menu. This allows you to specify additional options/flags which are normally only available to the command-line "import" tool (see documentation above). |
Exporting Items
The item exporter can export a single item or a collection of items, and creates a DSpace simple archive in the aforementioned format for each exported item. The items are exported in a sequential order in which they are retrieved from the database. As a consequence, the sequence numbers of the item subdirectories (item_000, item_001) are not related to DSpace handle or item IDs.
...
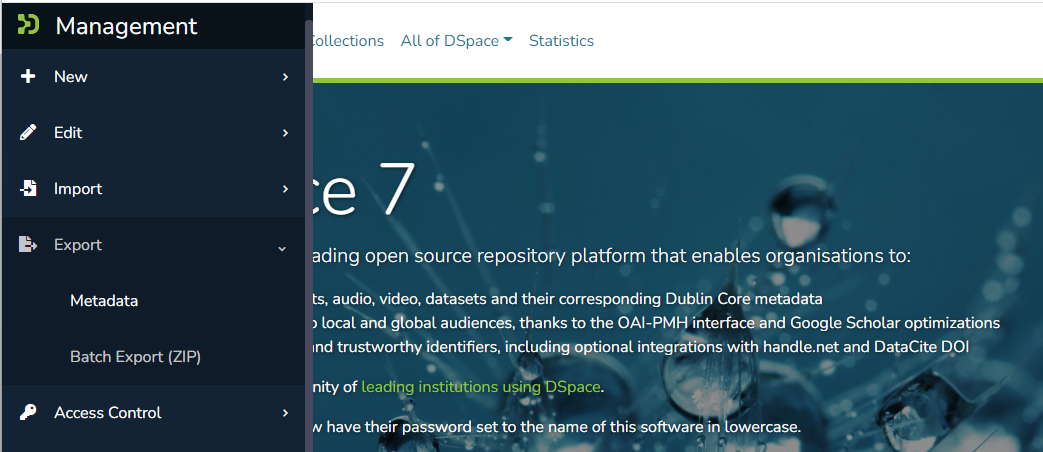
- Login as an Administrator.
- In the side menu, select "Import" → "Batch Export (ZIP)"
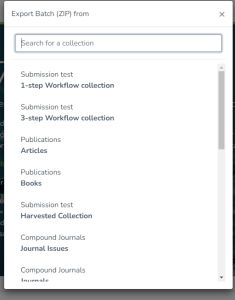
- Select or search for the Collection to export from:
- Clicking "Export" will start the Batch Export. This creates a new "Process" which begins export process. Depending on the size of the export, this process may take some time to complete. You can refresh to page to see the current status, or go back to the list of processes ("Processes" menu in sidebar) to check on its status. Once the process is COMPLETED, you will see a log of the results and an exported ZIP file which you can download for the results.
- All prior exports will be listed in the "Processes" menu, until their corresponding process entry is deleted. Once you are satisfied with the export and have downloaded the ZIP, you may wish to delete that process entry in order to free up storage space (as your exported ZIP will be retained in DSpace until the process is deleted). A "process-cleaner" script can also be started from the "Processes" page which can be used to bulk delete old processes.
| Note |
|---|
It is also possible to start an "export" directly from the "Processes" menu. This allows you to specify additional options/flags which are normally only available from the command-line "export" tool (see documentation above). It also allows you to export a single Item. |
Overview
Content Tools