Contribute to the DSpace Development Fund
The newly established DSpace Development Fund supports the development of new features prioritized by DSpace Governance. For a list of planned features see the fund wiki page.
Target Audience
Content Submitters
Overview
The item submission process lets authorized users deposit contents using metadata and bitstreams. It primarily consists of components.
- Target collection where the item needs to be submitted
- Submission form using which metadata and bitstreams related to the item are submitted
- The submission form also helps in defining Access rights around an item
Submission Form Highlights1. Bitstream upload section This section allows users to upload bitstream(s) by browsing or drag & drop mechanism. 2. Target Collection It is a location where the item will be submitted. 3. General Metadata section Users can define general or primary metadata about an item in this section. 4. Additional Metadata section This section allows users to add secondary or additional metadata. 5. Bitstreams Management Bitstreams uploaded by users list in this section. Using various options, they can further define these bitstreams or remove them from the attachment list. 6. Deposit License Users need to accept the license in this section to submit the item to the repository. 7. Manage Item Submission a. Discard: The user can discard the submission by clicking this button. Action will delete all information populated in the form permanently. b. Save: This button helps save information in the submission form and helps resume information update should the process gets interrupted. c. Save for Later: Save information in the MyDSpace section to update later. d. Deposit: Click this button to complete the submission. The item will go to the next step as per the workflow defined for the collection. |
|

Item Submission Process
Step 1: Login using your credentials

Step 2: Roll over the cursor on the “+” sign

Step 3: Click on “New” and click on “item” for proceeding further in the Item addition process

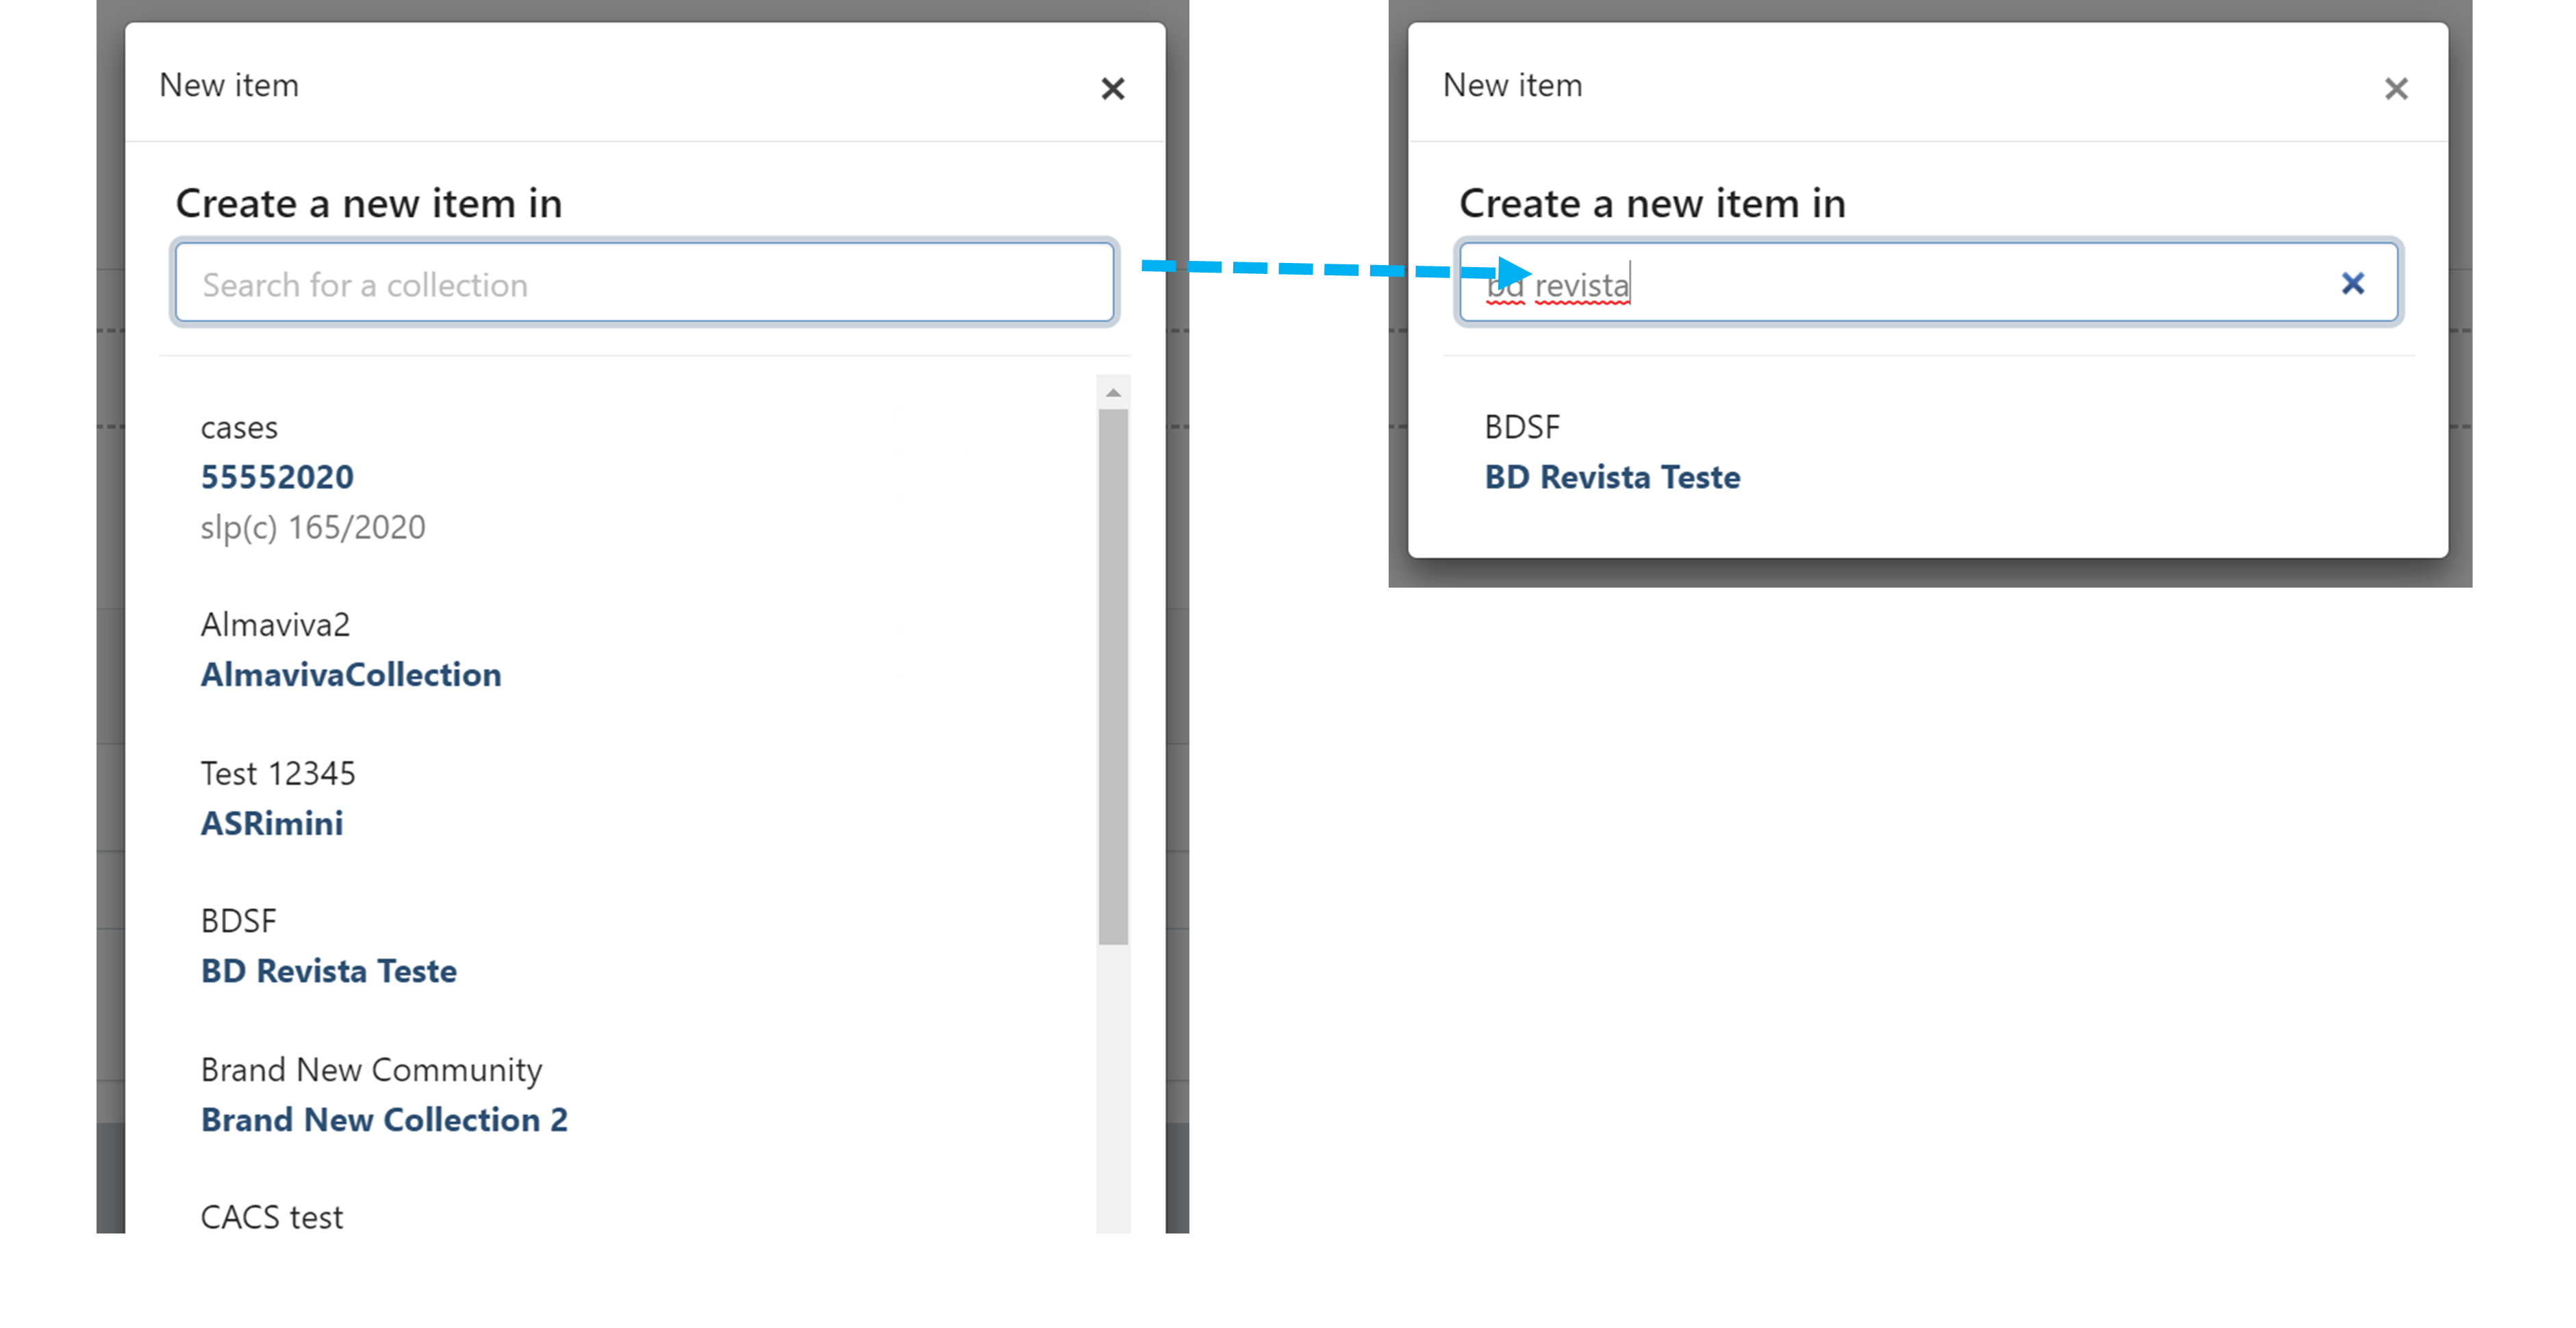
Step 4: A popup window with a collection list will appear. The user can select the target collection by typing its name or scrolling down the collection list. Then, click on the collection to initiate item submission.
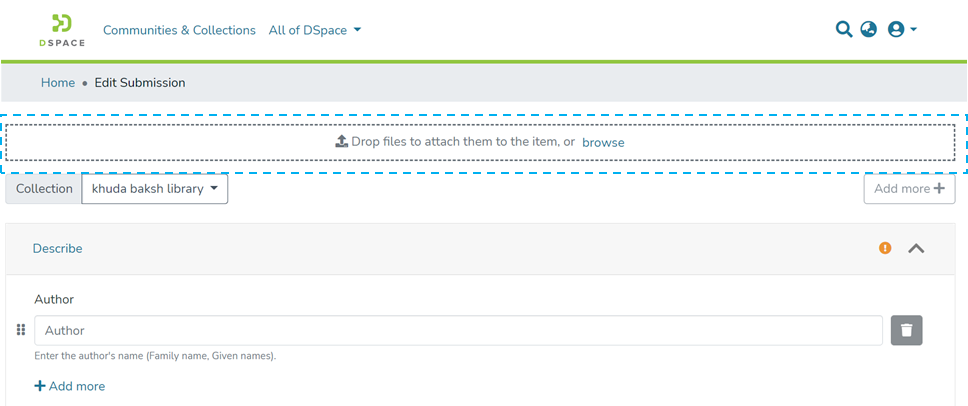
Step 5: Users will see the item submission form after selecting the target collection. The first step is to upload the attachment(s) in the item. In DSpace terminology, an attachment is known as a “bitstream”.
Click on the “browse” link to upload attachment(s). Users can upload multiple files by selecting them together or dragging in the space.
A progress bar showing bitstream upload progress will appear, as demonstrated in the illustration below. In addition, after a successful bitstream upload, a prompt confirming success or failure will appear.

Bitstream upload in progress

Bitstream Upload Successful
Step 6: After bitstream upload, the next step is to describe the item by adding metadata.
Metadata fields marked with “*” are mandatory, and users need to populate information in these fields to complete the submission mandatorily. A few examples in the standard submission form are Author, Title, and Date of Issue.

Users will notice an alert mark at the top right of the “Describe” tab turning from Amber to green once mandatory fields have values. Below is an illustration showing the state of the “Describe” section having values in all mandatory fields.

Step 7: The user can further update bitstreams by clicking on Buttons appearing next to the bitstream title.

Download: Click this button to download bitstream on a local machine.
Edit: Update bitstream details and access rights using this button. More explanation is provided below.
Delete: Clicking this button will delete the bitstream from the submission form.
Step 8: By clicking the edit button next to the bitstream, users can update bitstream information, as explained below.
Update the bitstream title and add descriptions to describe the attachment further. Please refer to the below illustration demonstrating both functions.

Users can define access conditions for the bitstream by selecting the appropriate option from the dropdown list. These options are:
- Open Access: Select this option to make the bitstream available without any restriction.

- Lease: This option is applicable when a user wants to keep bitstream accessible until a specific date in the future. The bitstream will not be available as open-access content after the defined date under the “Grant access until” option.

- Embargo: In contrast to a lease, an embargo allow the user to keep bitstream access restricted until a future date. This date is defined in the “Grant access from” field. The bitstream will be available as open-access content to users after this date.

- Administrator: Select this option if the bitstream’s access remains limited to administrators.

Step 9: Finally, users must click on the “I confirm the license above” checkbox to accept the deposit license and click on the “Deposit” button to complete the item submission.

Overview
Content Tools
All content on the LYRASIS Wiki is licensed under the CC BY (Attribution) license![]() , unless otherwise noted.
, unless otherwise noted.