Contribute to the DSpace Development Fund
The newly established DSpace Development Fund supports the development of new features prioritized by DSpace Governance. For a list of planned features see the fund wiki page.
Audience
Repository Administrator
Community Administrator
Collection Administrator
Create Collection
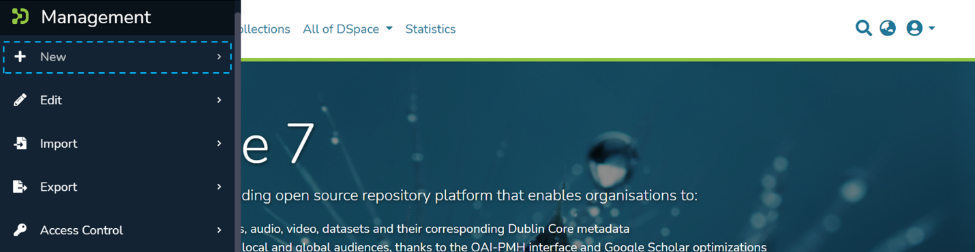
Step 1: Login using your credentials

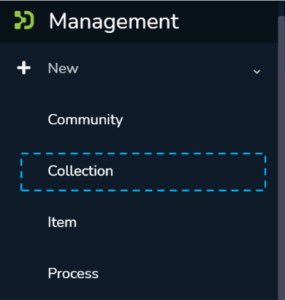
Step 2: Rollover your cursor on the “+” sign

Step 3: Click on “New” and click on “Collection” to proceed with the collection creation process.
Step 4: A pop-up window showing a list of communities will appear. Type the community’s name in the search field where you want to add this collection. Upon typing a few letters of the community’s name, a list of communities having those letters or words will appear. Click on the community name for initiating collection creation.

Step 5: A Create Collection form opens to populate information regarding the collection.

- Collection logo – Click on the ‘browse’ link to select an image file to add as the collection’s logo. It is advisable to maintain uniform dimensions of the logo across the repository.
- Name – The collection’s name is a mandatory field and marked in ‘*.’
- Introduction text (HTML) – Users can enter introductory text providing an overview of the contents stored in this collection. One can utilize HTML tags to format the text or continue entering the plain text content.
- Short Description – This field can have a one-line description of the collection that appears with the collection name on the community homepage.
- Copyright text (HTML) – Users can enter copyrights related information here. Fields marked with (HTML) support HTML tags-based formatting.
- New (HTML) – Enter news about this collection. Users can update this by going to this section via Edit Collection.
- License – Add license-related information here.
- Entity Type – Select Entity from the drop-down that must be uploaded in the collection.
- Action Button – Users can click on the appropriate button as determined. Clicking on the Save button will add the collection into the repository.
Step 6: Click on the ‘Save’ button to complete the Collection creation process. A success prompt will pop up upon collection creation, and the application will automatically open the collection homepage.

Success prompt upon collection creation

Collection homepage
Overview
Content Tools
All content on the LYRASIS Wiki is licensed under the CC BY (Attribution) license![]() , unless otherwise noted.
, unless otherwise noted.