Overview
In order to provide bit-level preservation, we use the Audit Control Environment Audit Manager to run periodic fixity checks on Bags stored in Chronopolis. The ACE Audit Manager web application gives us two levels of verification when doing our checks: the first is that the file is valid, and the second is that the digest for the file is valid.
When distributing a Bag throughout the Chronopolis network, ACE Tokens are generated and distributed alongside the Bag so that we have a single source for the ACE Tokens. The ACE Tokens are loaded before the initial audit of a Bag which provides assurance that the digests for each file are correct, as any file which generates an incorrect fixity will be flagged as corrupt through the Token validation.
In addition, there is timestamp information stored in the ACE Tokens which serves as a piece of provenance for when a file was first validated by Chronopolis.
Links
Installation
Installation instructions are available on the ACE Wiki
Administration
Database Connection Setup
Note: ACE-AM does not currently work with the mariadb java connector
https://github.com/brettwooldridge/HikariCP/wiki/About-Pool-Sizing
It is recommended that the connection pool size for your database is max_connections = ((core_count * 2) + effective_spindle_count. So for a cpu with a core count of 16, you should start with a maximum pool size of 32.
In addition, the maximum idle and wait times should also be set in order to reclaim old connections.
By default Tomcat ships with DBCP and its configuration should look like:
<Resource name="jdbc/aceamdb" auth="Container"
  driverClassName="com.mysql.jdbc.Driver"
  maxTotal="32"
  maxIdle="10"
  maxWaitMillis="300000"
  testOnBorrow="true"
  type="javax.sql.DataSource"
  url="jdbc:mysql://localhost/aceam?characterEncoding=UTF-8"
  username="ace"
  password="-----------"
  validationQuery="SELECT 1"/>
If using HikariCP, the HikariCP jar and slf4j-api jars will need to be added to Tomcat's lib directory. The resource configuration will then look like
<Resource name="jdbc/aceamdb" auth="Container"
      factory="com.zaxxer.hikari.HikariJNDIFactory"
      type="javax.sql.DataSource"
      minimumIdle="10"
      maximumPoolSize="32"
      connectionTimeout="300000"
      driverClassName="com.mysql.jdbc.Driver"
      jdbcUrl="jdbc:mysql://localhost/aceinnodb?characterEncoding=UTF-8"
      dataSource.user="ace"
      dataSource.password="-----------" />
Collection Management
Removing A Collection
When viewing a collection, select the Remove Collection option from the drop-down list of available actions. You will be prompted to acknowledge the delete, after which all files, tokens, and logging events will be removed from ACE.
On larger collections, it can take time for all the monitored information to be removed, but ACE can still be browsed during this time.

Removing A File
Browse Servlet
When viewing a collection, select the Browse Servlet from the list of available actions. This will bring you to a separate servlet showing a list of all monitored files and directories for the collection. Selecting a File will then bring up information about the File, including actions to take on that item. Selecting ![]()
Remove will remove the File from tracking in the Collection, and the page will likely need to be refreshed to accurately display the contents of the Collection.

Report Servlet
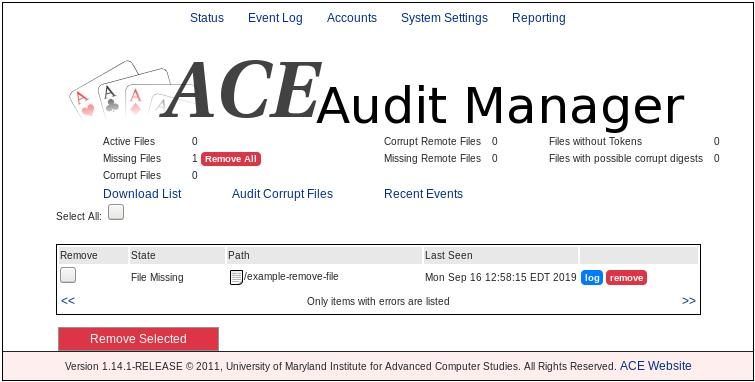
If a File has been intentionally removed from disk and needs to be removed from ACE AM, a File Audit can be run in order for it to be marked as Missing. Once a file has been marked as Missing, the Report Servlet can be selected in order to view the Report from the latest Audit. From the ![]()
Report Servlet, the missing file can be removed by using any of the Remove actions (all, selection, single). ACE AM will then prompt for confirmation to remove the File(s) after which they will no longer be tracked. A File Audit should be run after removing any files from the Report Servlet so that the error status of the collection can be cleared.
Peer Auditing (Collection Compare)
Creating Peer User
Creating a new user is done through the Accounts servlet which is available from the top-most navigation bar in ACE AM. Supplying an account with the following properties allows a peer to log in and provide any comparison operations without allowing them to make changes to your local ACE.

Adding A Peer
Adding a site is done through the /PartnerSite page. Currently no link is available on the main ACE page - only through editing a collection's settings: Add Peers -> Add New or the Compare Collection -> Add New under Partner

Running the Audit Auditing
In order to initiate an on demand peer comparison, the Compare Collection option must be selected when viewing a collection. Then, selecting the Partner option will bring up a list of all peer ACE AMs, which can be selected. ACE will try to find the matching collection by default, but if it is not found you must select the collection to compare to your self.

Re-Importing Tokens
Occasionally we need to re-import tokens in order to keep consistency among the network about what is being validated. This can be done either through the API or through the web UI, and this example will be going through the UI.
- Transfer the token store for your collection on to a local workstation (this is needed for the file upload)
- Tokens are transferred alongside the collection, so they should be on the same filesystem your replication client pulls into.
- Within chronopolis, the token store is normally suffixed with the date it was written, so for the collection
figshare_1074_productionfiles_2019-05-22-10-53-00the token store will befigshare_1074_productionfiles_2019-05-22-10-53-00_2019-06-06
- Select your collection in the ACE AM interface and using the
more...drop down menu, selectImport Tokens
- Using the Browse form option, navigate to the token store which you transferred to your local workstation and upload it to the ACE Audit Manager
- Status of the Token Import can be tracked in a few ways
- The
Import Tokensservlet should direct to aTokenImportStatuspage, showing which tokens are processing - The
aceam.logwill display a line when a token is imported - The
Event Logwill receive new entries titledTOKEN_INGEST_UPDATEwhich will all be linked to the session which is importing the Tokens
- The
Database Dump
Directions for dumping the ACE Database:
For example at UCSD, aceServer is the ACE database server, aceUser is the DB account, and aceDB is the ACE database
mysqldump -h aceServer -u aceUser aceDB -p > ucsd-ace-2019-06-21.sql
gzip ucsd-ace-2019-06-21.sql
Upload to chron-ingest
Assumes the current user has an SSH public key in the chronopolis user authorized_keys for incoming
rsync ucsd-ace-2019-06-21.sql.gz chronopolis@chron-ingest.ucsd.edu:.
Now the ACE Database dump is at UCSD and can be bagged and deposited into chronopolis as depositor chronopolis