All Versions
- DSpace 7.x (Current Release)
- DSpace 8.x (Unreleased)
- DSpace 6.x (EOL)
- DSpace 5.x (EOL)
- More Versions...
Table of Contents
Entity-relationship is a new concept introduced in the DSpace version 7, helping authorized users logically link two or more items by defining relationships among them. A few good examples are the Relationship between an article & Author, a Journal and Journal Article, Organization Unit and Individuals in the unit, etc.
...
Step 1: Login using your credentials


Step 2: Go to the Item you want to edit
...
Click on the “Edit” button appearing towards the right-hand side of the item title.

Step 3: Click on the “Relationships” tab.

Step 1: Click on the “Add” button next to the relationship type to map Item (s) under each relationship type. For example, click on the “Add” button next to Publications to add an item as a related publication.

Step 2: Identify target items for addition using Filters and Search functions. Please note that process is identical to the advanced search process.
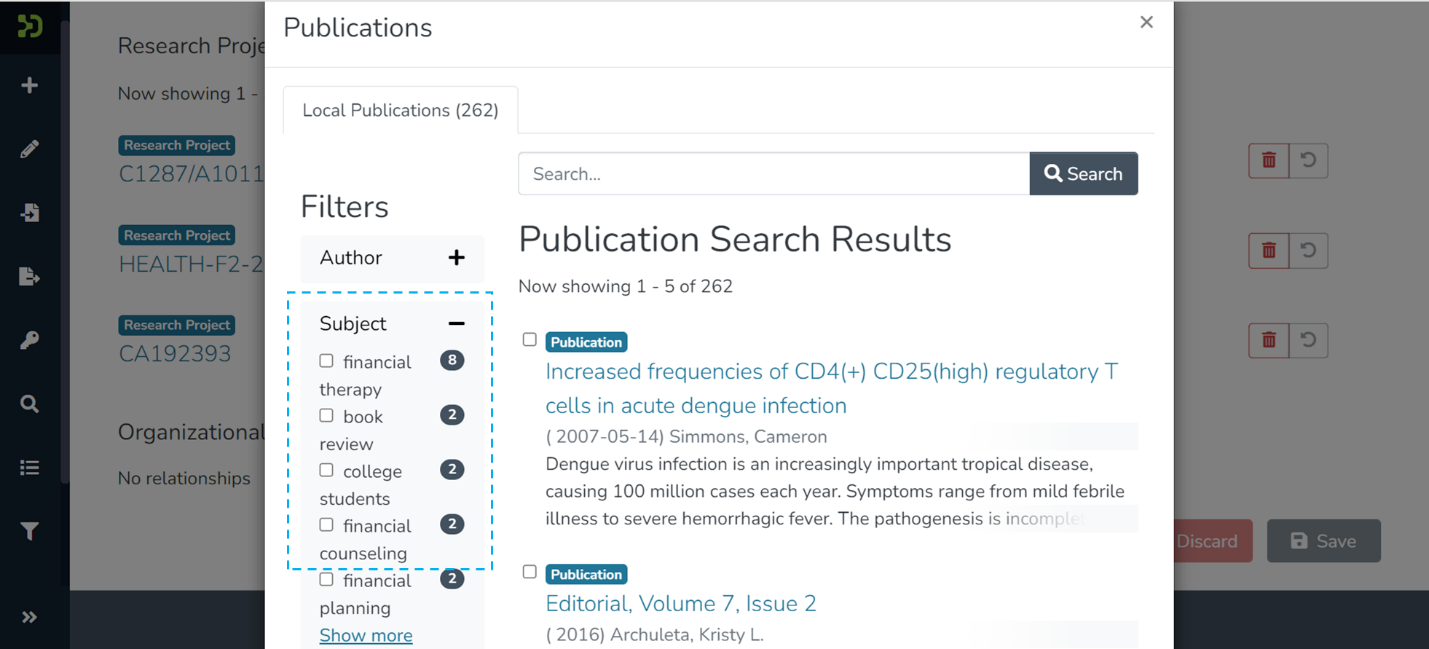
Step 3: Click checkboxes appearing on the left-hand side of each Item to select them for the Relationship.

Step 4: Scroll down to the bottom of the screen and click on the “Save” button to complete the process.

The application will redirect users to the source item’s relationship tab, highlighting newly added items for easy identification.

Step 5: Click on the “Save” button to confirm the item addition under the selected relationship type or click “Discard” to undo the addition.

Users will see a prompt confirming the successful mapping of items under the selected relationship type.
Step 1: Click on the “delete” button appearing a bitstream and drag it above or below another bitstream(s) in the bundle to change the bitstream’s sequence.

Step 2: A prompt showing items concerning the selected Item will appear in the prompt. Click the checkbox appearing next to items. Please refer screenshots below for a better understanding.

List of items concerning the selected Item.

Click on the checkbox highlighted before the Item
...
Step 3: Click the “Save” button to complete the selection process and go back to the Relationship tab of the source item.

Step 4: Click on the “Save” button to confirm the deletion under the selected relationship type or click “Discard” to undo the action. Users will see a prompt confirming the successful deletion of items under the selected relationship type.
...