Deprecated. This material represents early efforts and may be of interest to historians. It doe not describe current VIVO efforts.
Page History
Deprecated. This material represents early efforts and may be of interest to historians. It doe not describe current VIVO efforts.
note|Some of the content on this page refers to VIVO 1.2 and earlier releases. Please see VIVO v1.3 VirtualBox Appliance for additional information.
Introduction
The following procedure will allow you to quickly deploy a running instance of VIVO for testing and evaluation purposes only. To make deployment easy, we built a preconfigured virtual appliance. It has been built and configured with all the required software and should run VIVO with little configuration. VirtualBox, a free virtualization tool distributed by Oracle is required. The operating system of the appliance is Linux (Debian Lenny). You will need to make a few minor configuration changes using the command line after your installation is complete.
For more information and tutorials on VirtualBox, visit http://www.virtualbox.org/wiki/VirtualBoxTV.
System Requirements
VirtualBox can be installed on most operating systems. The following are some general system requirements:
- Windows XP, Vista or Windows 7
- Mac OS 10.4 or newer
- Linux
- 2GB RAM
- 10GB Free Disk Space
Install VirtualBox
Download the latest VirtualBox EXE from http://www.virtualbox.org/wiki/Downloads
Install the software by double-clicking the executable file for Windows.

Click the button indicating you want to Run VirtualBox. Warnings may appear which alert you when downloading files from the Internet.

If you do not have administrator rights on your computer, you must log out of your machine and log back into the computer as an
administrator.

Once the file is downloaded, the VirtualBox Setup Wizard will guide you in completing the installation.


The installation may temporarily disrupt your network connection. Connection should be restored momentarily.


When the VirtualBox installation is complete, the application will open.
You may minimize the application until after the next step.

Download and Install Virtual Appliance
The current release/version of VIVO is updated on a Virtual Appliance
located at VIVO Downloads. It contains all the existing
functionality and pre-loaded VIVO ontology.
...
Open your internet browser and download the zip package from the site.

Save the files to any location on your computer. The Desktop is an easy place to locate these files for later use

The files are rather large and may take more than 10 minutes to download.

Once downloaded, you must extract the files contained in the zip package. It is best to save the files in the same location as the
download.

Import the Appliance into VirtualBox
...
Click, File >> Import Appliance

Click Choose to locate the file on your computer.

Locate the .ovf file extracted from the zip package and click Open then Next.

Adjust the resources if you wish. You can increase RAM or CPU for improved performance. You can uncheck
Floppy, USB Controller, and Sound Card since they will not be used Click Import

Importing the appliance may take several minutes as indicated by the status bar.

Once imported, the virtual appliance will appear in VirtualBox.
NOTE: You may now delete the downloaded files from your computer

Configure Networking
note|This refers to Virtualbox < 4.0. For the new way to forward ports in Virtualbox > 4.0 please follow this guide: http://www.rustyrazorblade.com/2010/12/virtualbox-4-nat-port-forwarding-gui/
...
Type ‘cmd’ and click OK to open a command prompt

Copy and enter the following codes one at a time. Each command should appear on one line.
...
Return to VirtualBox and click on the Settings icon.

Go to Network >> Adapter 1>> Advanced >>Mac Address:
Change the Mac Address to: 080027912706
And click OK.

Now start the virtual machine in VirtualBox.
...
It is not necessary to login to the console at this time.

Testing
Tomcat Server
Tomcat should now be running in the virtual appliance.
...
Username: vitro
Password: vitro123
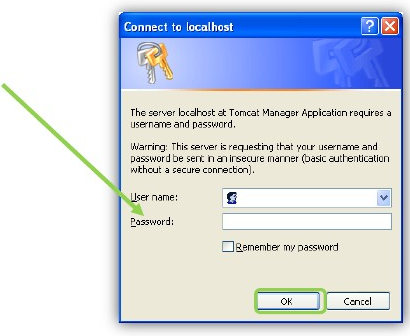
Upon login, you should see the Tomcat Web Application Manager
...
If so, try using http://127.0.0.1:8080/manager/html/list instead.

Vitro
Accessing http://localhost:8080/vivo should load the VIVO homepage.
...
Username: defaultAdmin
Password: vitro123

Please note, you may experience a problem accessing the interface using
"localhost". If so, try using http://127.0.0.1:8080/vivo instead.
You can now use the virtual appliance to evaluate and perform tasks in
VIVO.
Virtual Appliance Security Cleanup
If you plan on using the appliance in a production environment, it is very
important that you change the default passwords in the appliance for
security purposes. The passwords you should change are:
...
Overview
Content Tools