Contribute to the DSpace Development Fund
The newly established DSpace Development Fund supports the development of new features prioritized by DSpace Governance. For a list of planned features see the fund wiki page.
July 19, 2010: These instructions are out-of-date, confusing and need a full review. If you are using Eclipse with DSpace for development, please help us to simplify and clarify these instructions. Please, work with the new page at DSpace IDE - Eclipse, Git, Maven, and Tomcat.
Eclipse Tools: Prerequisite Installation
Eclipse (required)
Obviously, to do this you will need to have Eclipse Installed: http://www.eclipse.org/
This HOW-TO has been written using Eclipse 3.4 (Ganymede), but it is also known to work in Eclipse 3.3 as well. The information here probably works with other versions of Eclipse, but no guarantees are made.
We need to install a variety of plugins to allow us to interact with DSpace and Tomcat in a fully integrated way. To install plugins into Eclipse you should use: Help -> Software Updates
On this page you will find a couple of pre-set install sites. For the plugins that we need we also need to add some new sites to this list (see next section), which is done by clicking on the "Available Software" tab, and clicking "Add Site.." on the right.
After you have installed all of these plugins, or in-between each one, you will need to restart the Eclipse workspace
Install the SVN Plugin
Subversion (SVN) enables you to checkout the DSpace source code and keep up-to-date with the latest changes to the platform from DSpace Repository.
Eclipse >= 3.5:
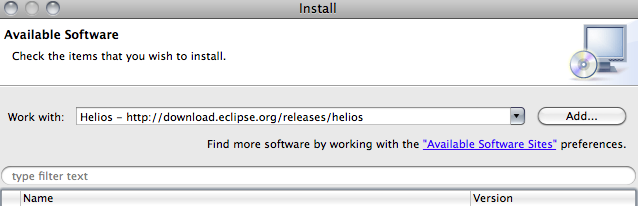
In Eclipse select "Help --> Install New Software...".

In the drop down list select "Helios - http://download.eclipse.org/release/helios."
From the list select "Collaboration --> Subversive SVN Team Provider"

Click the "Next >" button and follow the dialogs to install the plugins.
Restart Eclipse.
Eclipse ask you which Subversive Connector you want to use. Choose SVN Kit or JavaHL.
Eclipse < 3.5:
There are 2 popular SVN plugins for Eclipse. You only need to install one of them:
- SubVersive Install Instructions: http://www.eclipse.org/subversive/downloads.php
- SubClipse Install Instructions: http://subclipse.tigris.org/install.html
You should install the most recent version of your preferred client. The recommendation is SubVersive (as it is an Eclipse Incubation project), and the remainder of this tutorial assumes that this is the one you are using.
28th July 2007: This is an additional commentary on the current situation. As of version 1.1.3, Subversive uses the JavaHL bindings for the default Subversion client (this is the same as Subclipse). Whilst largely positive, this is not without it's side effects. Firstly, most of the unique functionality of Subversive will not work with JavaHL (it only works with JavaSVN, which is not only no longer the default, it's effectively deprecated). Secondly, the 'compare with' functionality does not work for folders, only individual files. For these reasons, it may be better for now to use Subclipse - which shares much of the same functionality, and the 'compare with' feature does work with folders (when using the JavaHL bindings). If you are thinking of switching to Subclipse from Subversive, then one thing you may find is that the labelling of new and changed files is not as clear as it was with Subversive. This can be rectified by going into preferences dialog, and under Team -> SVN -> Label Decorations, select the Text tab. Then set 'Label decoration for outgoing' to '>' and 'Label decoration for added' to '*' - this will effectively replicate Subversive's labelling.
Note: also that if you are using a plugin with the 'JavaHL' bindings, you will need to have the Subversion command line client installed and available on your path, and the JavaHL shared libraries installed and either ensure that the LD_LIBRARY_PATH environment variable is set to include the directory containing the JavaHL libraries, or that you include that path in a -Djava.library.path= definition in your eclipse.ini.
SysDeo Tomcat Plugin (optional)
If you'd like to run Tomcat directly within Eclipse, and do some basic debugging, you may find it useful to install this Tomcat Plugin.
Install the most recent version of the plugin, which is available for download from:
http://www.eclipsetotale.com/tomcatPlugin.html
Unfortunately, there is no remote URL location for the sysdeo plugin. You will have to manually download the plugin and unzip it into the [eclipse]/plugins directory. Also, you will need to have Tomcat installed locally. Obtain the latest version of Tomcat from: http://jakarta.apache.org/tomcat
Maven 2 Plugin (required for DSpace 1.5)
You only need to install Maven if you are using DSpace 1.5 or later.
Prerequisite: Before installing the Maven 2 Plugin for Eclipse, you must install Apache Maven from http://maven.apache.org/
Install the most recent version of the plugin using the below remote URL.
Remote URL: http://m2eclipse.sonatype.org/update/
The remote URL for the m2eclipse project has moved to: http://m2eclipse.sonatype.org/sites/m2e
Web Standard Tools (optional)
These are tools for convenience in using Eclipse with web application projects such as DSpace. They are not required for having DSpace and Eclipse integrated, although they are useful
For Eclipse 3.2.2
This uses a pre-configured plugin site. Go to: Callisto Discovery Site -> Web & J2EE Development -> Web Standard Tools and select the checkbox on the left. This will alert you to required dependencies. Click "Select Required" on the right and this will resolve those dependencies.
For Eclipse 3.3
This uses a pre-configured plugin site. Go to: _Web Tools Platform (WTP) Updates -> Web Tools Platform (WTP) -> Web Standard Tools (WST) Project _ and select the checkbox on the left.
Database Tools (optional)
These are tools for convenience in using Eclipse with web application projects such as DSpace. They are not required for having DSpace and Eclipse integrated, although they are useful
For Eclipse 3.2.2
This also uses the pre-configured plugin site. Go to: Callisto Discovery Site -> Database Development and select the checkbox on the left (this will also select all the packages underneath that directory). Click "Select Required" to resolve the dependencies before installing
For Eclipse 3.3
This also uses the pre-configured plugin site. Go to "Europa Discovery Site -> Database Development '' and select the checkbox on the left selecting all the packages underneath that directory.
Configuring your working environment
Obviously it's really up to you how you want your Eclipse to look, but this section details how to configure the tomcat plugin in general, and which views you will find useful to have included in your main Java Perspective.
Code Formatting
- Download the DSpace's Coding Conventions config file: dspace-eclipse-format.xml|IDE Integration - DSpace, Eclipse and Tomcat^dspace-eclipse-format.xml|||^Dspace-eclipse-format.xml|^Dspace-eclipse-format.xml|\Install either as workspace default or for your individual DSpace project(s).
- #* (Workspace Default) Select Window -> Preferences in Eclipse. Go to the Java -> Code Style -> Formatter. Click the "Import..." button and select the file.
- (Individual Project) Right click on the DSpace project, select Properties. Go to the Java -> Code Style -> Formatter. Click the "Import..." button and select the file.
Preparing the Tomcat Plugin
- Open the Tomcat preferences pane: Window -> Preferences -> Tomcat
- Select your installed Tomcat version, and its home page (hit Apply when finished). For example:
- Tomcat Version: 6.x
- Tomcat Home: /opt/tomcat6
- Under Tomcat -> Advanced, enter the Tomcat Base (hit Apply when finished). This should generally be the same as the Tomcat Home:
- Tomcat Base: /opt/tomcat6
- Under Tomcat -> JVM Settings, you need to enter the JDK's
tools.jarfile for the "Classpath (before generated classpath)". You should find this in the directory[installed jdk]/lib/tools.jarNote: If you are using Mac OS X, thetools.jarlibrary does not exist on the platform. Instead usingclasses.jarfound at:/System/Library/Frameworks/JavaVM.framework/Versions/${JAVA_VERSION}/Classes/classes.jar - Under Tomcat -> Tomcat Manager App, enter a username and password for the desired manager user. If this user doesn't already exist hit "Add user to tomcat-users.xml" (hit Apply when finished)
Visual Configuration of Eclipse
To add a new View to the current Perspective, use: Window -> Show View -> Other (in general). From here you can select the view to open from a list of available categories.
- Add the Console View (General -> Console)
- Add the Database Explorer View (Data -> Database Exporer)
- Activate line numbering: Window -> Preferences -> General -> Editors -> Text Editors and select "Show line numbers"
Setting up the remote SVN target
- Open the SVN Repository Exploring Perspective by using Window -> Open Perspective -> Other -> SVN Repository Exploring
- Right click in the "SVN Repository" View on the left, and use: New -> Repository Location
- Enter the location of the DSpace SVN repository: https://dspace.svn.sourceforge.net/svnroot/dspace
"Access restriction: The type DataSource is not accessible due to restriction on required library <jre_path>/lib/rt.jar"
For some reason, Eclipse is configured by default to forbid direct use of some types which are defined in the JRE. There are a lot of new restrictions on version 1.6 of the JRE and this is one of them. You can find lots of queries and lots of advice about this on the Web, mostly to the effect that you can disable the error. It may be better, however, to take the rarer advice and rearrange the build path for an affected project:
- On the Project menu, select Properties.
- In the resulting dialog, select the Java Build Path category, then its Order and Export tab.
- Select JRE System Library and move it below Maven Dependencies.
Working with DSpace 1.4.x
(If you are working with DSpace 1.5 see the Working with DSpace 1.5 section after this)
NEEDS UPDATING – Not sure this actually works! [15 Apr 2008]
Checking out DSpace as a Tomcat Project
- Open up the location with the arrow on the left, and drill down to find trunk/dspace
- Right click on trunk/dspace and select "Find/Checkout as..."; leave "Check out as a project configured using the New Project Wizard" selected and hit "Finish".
- You will be given a list of project types to check out as. Select Java -> Tomcat Project and hit "Next"
- Insert a name for the project. For example dspace-svn. Then hit "Next".
- Leave the context name as-is (this is the url path that dspace will become available under), and leave "can update context definition" checked. In the box marked "Subdirectory to set as application root" enter "/jsp". Then hit "Finish".
- Follow the on-screen instructions, and see the source code get checked out into your eclipse workspace. You should now have a new project called dspace-svn, which will contain some additional things to the contents of the SVN repository, including now a directory named "work", and two files: .cvsignore and .tomcatplugin
- Configure the fine details of this Tomcat Project by right clicking on the project name and selecting Properties -> Java Build Path
- Java Build Path -> Source: "Add Folder" on the right, and select the "src" directory in the root of the project (you may notice your project being compiled in the background)
- Java Build Path -> Source: select the folder dspace-svn/jsp/WEB-INF/src and hit "Remove" on the right
- Java Build Path -> Libraries: "Add JARs" on the right, and select all of the files in dspace-svn/lib and hit "OK". This tells Eclipse to use these as part of your classpath, and your deployed application.
Now we have DSpace set up as a tomcat project, although it won't work yet until we've installed DSpace into the Eclipse Workspace ...
Installing DSpace 1.4.x into the Eclipse Workspace
Preparation for install
This section is principally the same as the standard DSpace installation, so assumes that you are familiar with that process, and doesn't dwell on potential difficulties.
- Obtain the PostgreSQL JDBC driver, and drop it into dspace-svn/lib
- Create a directory dspace-svn/jsp/WEB-INF/lib
- Copy all of the jar files from dspace-svn/lib into dspace-svn/jsp/WEB-INF/lib
- Open up the project Preferences, and go to Preferences -> Java Build Path -> Libraries, and use "Add JARs" to add the new JAR file for postgres
- create a directory under dspace-svn into which you want to install the application. For example dspace-svn/working-copy
- copy dspace-svn/config/dspace.cfg into dspace-svn/working-copy with the file name dspace.cfg.initial
- Prepare the configuration for installation in the Eclipse Workspace. The configuration does not need to be heavily modified, but the following points should be set correctly:
The installation path you give should be:
dspace.dir = <workspace>/dspace/working-copy
where <workspace> is the absolute path to your Eclipse workspace, and "working-copy" is the name of the directory into which we will install the DSpace application. Other configuration that you should ensure are set correctly are as follows (assuming installation on the local machine):
  # DSpace base URL.  Include port number etc., but NOT trailing slash
  dspace.url = http://localhost:8080/dspace-svn

  # DSpace host name - should match base URL.  Do not include port number
  dspace.hostname = localhost

  # Name of the site
  dspace.name = DSpace 1.4.x in Eclipse
Using Ant to install DSpace 1.4.x
- Now we can perform the install inside the Eclipse workspace. To keep everything nice and eclipse-centric, we will build it inside Eclipse using Ant. Right click on the build.xml file, and select Run As -> Ant Build... (note that there are two Ant Build options, and you want the second one, with the trailing dots)
- Targets Tag: uncheck "compile" and check "fresh_install"
- Main Tag: In the Arguments box, insert -Dconfig=/home/user/workspace/dspace-svn/dspace-install/dspace.cfg.initial
- Hit "Apply" at the bottom of the page, to save the build configuration
- Hit "Run" at the bottom of the page. If you have the Console view open you will see Ant building the DSpace application inside Eclipse. This will produce the usual output of a DSpace fresh_install. If you right click your project and hit "Refresh" you will see the changes it has made to your workspace. There will be a new directory called build which will contain the compiled classes, the built WAR files, and the dspace-web.xml and oai-web.xml files. Unfortunately, this method of working with DSpace will only support the main DSpace application (you can adapt this methodology to work with OAI in a different Tomcat Project). Your "working-copy" directory will also contain the fully installed application, including the assetstore, logs and so forth, which is very useful.
- Open the directory dspace-svn/build and copy the file dspace-web.xml into dspace-svn/jsp/WEB-INF with the name web.xml.
- Open the directory dspace-svn/build/classes and copy the file Messages.properties into dspace-svn/jsp/WEB-INF/classes
SVN Ignore
The following resources will be needed to be set to SVN Ignore, to ensure that unwanted resources are not committed to the repository:
.cvsignore
.tomcatproject
build/
jsp/local
jsp/WEB-INF/lib
jsp/WEB-INF/web.xml
work
working-copy
To set these to be ignored, right click on the resource and go: Team -> Add to svn:ignore then select "Resource(s) by name"
Viewing the application in a web browser
With the stages above complete you can now start tomcat and view the DSpace application in a web browser.
(Re)start the Tomcat web server through the Eclipse interface. This is done by clicking the right-most of the three tomcat buttons that are in the Eclipse toolbar courtesy of the SysDeo plugin. (In normal operation, you can restart the context without restarting tomcat, which can be done by right clicking on the project name and selecting Tomcat project -> Reload this context; furthermore, Eclipse will regularly auto-deploy the context while you are making changes). You can see the results of these actions reflected in the Console View if you have it open.
You should now find the DSpace deployed; try the following URL to see if it is working correctly:
http://localhost:8080/dspace-svn
Note that due to the limitations of the 1.4.x source structure, it is only possible to view one web application at a time from the same project when deployed within Eclipse. To work on the web interface and the OAI interface simultaneously you must use DSpace 1.5 and follow the instructions below. Otherwise, it is possible to modify this HOW-TO so that the OAI interface is deployed in Tomcat rather than the usual web interface.
Working with DSpace 1.5
Brief intro to DSpace 1.5 modules
DSpace 1.5 consists of several "modules", which better separate out the underlying DSpace API from the various user interfaces or web services available with DSpace. These modules are as follows (Note: some modules have sub-modules!):
dspace- The root module, which builds all of DSpace and holds the DSpace configurationsdspace-api- The DSpace API module, which contains all the primary business logic (Java code)dspace-jspui- The JSP-based User Interface for DSpacedspace-xmlui- The XML-based User Interface for DSpace (also known as Manakin)dspace-xmlui-api- The primary API for the XML-UI for DSpace (including all Aspect Java code)dspace-xmlui-wing- The Digital Repository Interface (DRI) API for XML-UIdspace-xmlui-webapp- The XML-UI web application configurations (including all Aspect & Theme definitions)
dspace-oai- The OAI-PMH interface for DSpacedspace-lni- The Lightweight Network Interface (LNI) for DSpacedspace-lni-core- The primary API for LNIdspace-lni-client- The client API for LNI (along with a simple sample client)dspace-lni-webapp- The LNI web application configurations
dspace-sword- The SWORD [interface for DSpacedspace-sword-api- The SWORD APIdspace-sword-webapp- The SWORD web application
language-packs- The Internalization (I18N) language packs for DSpace (Currently JSP-UI only - the I18N for Manakin is in thedspace-xmlui-webappmodule)pom.xml- The Maven module, which contains the primary Maven configurations to build DSpace
Checking out the projects
Because DSpace 1.5 consists of many "modules" (see above), it lends itself to being worked with as several separate Eclipse projects! However, you do have some choice in how you want to work with DSpace 1.5 in Eclipse. Overall, there seems to be three main options (feel free to add more if you have other ideas):
- The One-Big-Project Approach (RECOMMENDED - easiest to setup)
- Advantage(s): Only a single project in your Eclipse workspace. Can perform debugging through Eclipse Tomcat Plugin (but only for ONE user interface). Can have multiple DSpace 1.5.x versions running side-by-side in one Eclipse Workspace.
- Disadvantage(s): Can only debug ONE user interface at a time. This is a limitation of the Eclipse Tomcat Plugin, which only allows you to define a single Tomcat 'context' per Eclipse project. Slower build times since you are compiling all of the DSpace modules from source.
- The One-Project-Per-Module Approach (A little more complex to setup, but allows more flexibility)
- Advantage(s): Can use the Eclipse Tomcat Plugin for debugging, and debug multiple interfaces at the same time (e.g. JSPUI side-by-side with XMLUI, OAI-PMH and/or LNI)
- Disadvantage(s): Since each Eclipse project must be named the same as the corresponding DSpace module, you*cannot* have two DSpace 1.5.x (or above) versions running side-by-side in the same Eclipse Workspace.
- The Combined Approach (More difficult to setup. Need to verify if this route still works - 27 Mar 2008)
- Advantage(s): Can use the Eclipse Tomcat Plugin for debugging. Tries to combine the above two approaches to allow you to have different versions of modules checked out as separate projects in Eclipse. It also allows you to simultaneously debug multiple user interfaces (XML-UI, JSP-UI, OAI-PMH, and/or LNI) in Eclipse via the Tomcat Plugin.
- Disadvantage(s): It's definitely a little "messy" as far as Eclipse is concerned, since you will have several Eclipse projects within a primary project (and Eclipse favors a "flat" structure for its Projects). In addition, you must checkout and work with DSpace 1.5 code into a location not under your normal Eclipse workspace.
The One-Big-Project Approach
Eclipse no longer supports the "Enable Nested Modules" option described below. See: https://issues.sonatype.org/browse/MNGECLIPSE-2291
This is the simplest approach and therefore is highly recommended for any new/novice developers. This approach allows you to checkout DSpace 1.5 as a single Eclipse Project. However, it only allows you to define a single user interface to debug tools using the Eclipse Tomcat plugin.
- Select File -> New... -> Project in Eclipse
- Select SVN -> Projects from SVN and click "Next"
- Select to "Use an existing repository" and choose the DSpace SourceForge repository (https://dspace.svn.sourceforge.net/svnroot/dspace)
- Select the version of DSpace you want to checkout, likely either under "tags" (e.g. tags -> dspace-1_5) or "branches" (e.g. branches -> dspace-1_5_x). Click "Next"
- Choose "Check Out as Project with the name specified". Give it a name (e.g.
dspace-1_5_x), and click "Finish". Eclipse will then checkout the DSpace 1.5 source code from SVN. - Return to the "Java Perspective" in Eclipse ("Window -> Open Perspective -> Java"). You should see your newly created project in the Package Explorer.
- Right-Click on your project and select "Maven -> Enable Dependency Management". Eclipse will now read the Maven
pom.xmlconfiguration file and auto-configure your project as a "Java Project"! - Right-Click again, and select "Maven -> Enable Nested Modules". This tells Maven Eclipse plugin that your project contains several nested sub-modules within it.
- Right-Click one last time, and select "Maven -> Update Source Folders" ("Maven -> Download Sources" for Eclipse 3.2.0). Eclipse will now automatically locate all the DSpace Java source code, as well as all the 3rd party JAR dependencies.
You now have a complete copy of DSpace 1.5 source code! Jump directly to the section on how to Build and Install DSpace.
The One-Project-Per-Module Approach
This approach allows you to utilize the debugging tools available with the Eclipse Tomcat plugin, and treat your projects in a more "Maven-friendly" fashion. However, it will require you to create separate projects for each DSpace module.
Checkout each DSpace module as a separate Eclipse project, one-by-one, similar to the following:
- Open the SVN Repository Exploring Perspective by using Window -> Open Perspective -> Other -> SVN Repository Exploring
- Open up the location of the DSpace SVN repository with the arrow on the left, and drill down to select the version of DSpace you want to checkout, likely either under "tags" (e.g. tags -> dspace-1_5) or "branches" (e.g. branches -> dspace-1_5_x).
- Choose the DSpace modules you wish to work with (for a description of the available modules see the Brief intro to DSpace 1.5 modules above). You do not need to checkout all of the DSpace modules, but the following modules are required for DSpace to build properly:
dspace- the primary module, which builds/configures DSpacedspace-api- the DSpace API module
- Select the DSpace modules you wish to checkout, Right-click and choose "Check Out". Eclipse will checkout each DSpace module as a separate project, and give the project the same name as the module (e.g.
dspace-xmluimodule will be in an Eclipse project named "dspace-xmlui"). - Return to the "Java Perspective" in Eclipse. You should see a project created for each DSpace module.
- Select all of these new projects, Right-Click and select "Maven -> Enable Dependency Management". Eclipse will now read the Maven
pom.xmlconfiguration file under each of these projects, and auto-configure each project as a "Java Project"! - Select all of these projects again, Right-Click and select "Maven -> Update Source Folders". Eclipse will now automatically download all the 3rd party JAR dependencies for each of these projects!
Hints/Tips:
- Because of the number of DSpace 1.5 projects, you may want to change your Eclipse Package Explorer to display your projects as "Working Sets". This allows you to group similar projects together within a virtual "folder" in Eclipse.
- Click on the downward arrow in your "Package Explorer"
- Select "Configure Working Sets"
- Create a "New" working set and name it "DSpace 1.5" (or similar). Select all your DSpace 1.5 projects as its "contents"
- Ensure it is set to "visible" by placing a checkmark next to your new Working Set. Click "Ok" to save.
- Go back to the downward arrow in your "Package Explorer", and select "Top Level Elements -> Working Sets". Your Eclipse should now show a "DSpace 1.5" folder, which contains all your DSpace projects.
The Combined Approach
This approach attempts to combine the best of both of the above approaches. It allows you to utilize the debugging tools available with the Eclipse Tomcat plugin. It also allows you to potentially run two versions of DSpace 1.5.x side-by-side in the same Eclipse workspace (see Hints/Tips at end of this section). The disadvantage is that it is a little "messy", and requires that you checkout DSpace 1.5 to a location not in your normal Eclipse workspace.
- First, we will checkout DSpace 1.5 from SVN. You must perform the checkout into a location that is not under your Eclipse workspace folder. Therefore, if you perform an SVN checkout using Eclipse, you must move that folder to another location before you can proceed.
- (e.g.)
svn cohttps://dspace.svn.sourceforge.net/svnroot/dspace/branches/dspace-1_5_xdspace-1_5_x-src - NOTE: Make sure that you checkout DSpace 1.5 to a "stable" location (i.e. not to a temporary directory like
/tmp). During the next step (when you will import the DSpace modules into Eclipse), Eclipse will not copy the code into your Eclipse workspace. Rather, it will just reference the location where you have checked out DSpace 1.5 via SVN...so, this location will (in a sense) become your DSpace 1.5 "workspace". - ADDITIONAL NOTE: This requirement to checkout DSpace 1.5 to a folder not in your Eclipse workspace unfortunately seems to be a limitation of the
m2eclipseMaven plugin for Eclipse. If you attempt to re-import Maven projects which already exist in your Eclipse workspace, you will end up with a bunch of empty project folders.
- (e.g.)
- Next, we will point Eclipse at the location where you checked out DSpace 1.5 to, and tell Eclipse to import it as a series of Maven Projects
- Select File -> Import in Eclipse
- Select General -> Maven Projects as the type of source. Click "Next".
- Browse to the location where you just checked out DSpace 1.5
- Eclipse will automatically parse out all the various Maven projects which are located there (based on the location of the Maven
pom.xmlfile in each DSpace module). It will display a list of all DSpace modules & sub-modules, and allow you to check which ones you wish to import. If you don't want to import all the modules at this time, you can always go back and repeat this same process to checkout additional modules. - It is*highly recommended to always select the top-level
pom.xml, since this is the module which builds DSpace. - It is also*recommended to uncheck any sub-modules of
dspace-xmluiordspace-lni(e.g.dspace-xmlui-apiis a submodule ofdspace-xmlui). This will decrease the number of separate DSpace projects in your Eclipse workspace.- You may choose to uncheck any DSpace modules you are not planning on working with. For example, if you don't want to work with the DSpace LNI, then uncheck all of its modules (
dspace-lni,dspace-lni-core,dspace-lni-client,dspace-lni-webapp). As mentioned, you can always repeat this process to import the DSpace LNI code if you need to, afterall.
- You may choose to uncheck any DSpace modules you are not planning on working with. For example, if you don't want to work with the DSpace LNI, then uncheck all of its modules (
- After you have selected the DSpace modules you wish to work with, click "Next". Eclipse will now create the number of DSpace projects you selected, and auto-identify those projects which contain Java code as Java Projects. It will also locate all the 3rd party JAR dependencies for each project and add them automatically to your project's classpath.
- You should now have separate Eclipse projects for your various DSpace modules. Important: You'll notice that Eclipse did not move this code into your normal Eclipse workspace. Rather, Eclipse is just referencing those folders whereever you originally checked them out via SVN.
Notes:
- What you've done in this Combined Approach is basically "trick" Eclipse into allowing you to have projects within projects. In addition, Eclipse has not created folders in the normal workspace for any of this DSpace 1.5 code. Rather, it is just referencing the code in the location where you first checked it out via SVN.
- Because you have "tricked" it, Eclipse may not always refresh your DSpace 1.5 projects properly after a rebuild/update. This is easily fixed by manually selecting all the projects, Right-clicking and choosing "Refresh"
Hints/Tips:
- If you want, you can run multiple versions of DSpace 1.5.x (or above) side-by-side in your Eclipse workspace.
- To do so, you first must rename*all* of your existing DSpace 1.5.x projects (since Eclipse doesn't allow two projects of the same name). Right click on the project and select "Refactor -> Rename". Don't worry, this will not change the names of the folders on your filesystem (so Maven will still work perfectly).
- e.g. Rename
dspace-apiproject todspace-api-1.5alpha(for the 1.5alpha version of this project).
- e.g. Rename
- After renaming all of your existing DSpace 1.5.x projects, you can follow the directions for the The Combined Approach again to successfully checkout & import a different version of DSpace 1.5.x into the same Eclipse workspace.
- To do so, you first must rename*all* of your existing DSpace 1.5.x projects (since Eclipse doesn't allow two projects of the same name). Right click on the project and select "Refactor -> Rename". Don't worry, this will not change the names of the folders on your filesystem (so Maven will still work perfectly).
- Because of the number of DSpace 1.5 projects, you may want to change your Eclipse Package Explorer to display your projects as "Working Sets". This allows you to group similar projects together within a virtual "folder" in Eclipse.
- Click on the downward arrow in your "Package Explorer"
- Select "Configure Working Sets"
- Create a "New" working set and name it "DSpace 1.5" (or similar). Select all your DSpace 1.5 projects as its "contents"
- Ensure it is set to "visible" by placing a checkmark next to your new Working Set. Click "Ok" to save.
- Go back to the downward arrow in your "Package Explorer", and select "Top Level Elements -> Working Sets". Your Eclipse should now show a "DSpace 1.5" folder, which contains all your DSpace projects.
Build and Install DSpace
Defining Maven Tasks in Eclipse
The Maven build tool will compile all the relevant parts of the DSpace application so that we can work on it in the correct environment.
Note: If you look closely, you'll notice that each project directory has its own pom.xml file. This file contains the instructions to the Maven build system which tell it what to assemble for that DSpace module. The pom.xml file in the dspace project directory contain primary Maven instructions, and references all of the other pom.xml files.
To ease building/cleaning your DSpace projects, it's highly recommended to create some quick "tasks" within Eclipse's "External Tools Dialog". To get to the External Tools Dialog, look in the Eclipse toolbar for the Green "play" (>) button with a Red toolbox under it. Click on it, and select "Open External Tools Dialog".
- DSpace Clean task (Cleans all of DSpace)
- Right click on "Maven Build" section and select "New"
- Name it something like "DSpace Clean"
- Click the "Browse Workspace" button, and select your
dspacesub-module (or separate project). - In the Goals, enter "clean", click Apply.
- DSpace Assemble task (Assembles all of DSpace)
- Right click on "Maven Build" section and select "New"
- Name it something like "DSpace Assemble"
- Click the "Browse Workspace" button, and select your
dspacesub-module (or separate project). - In the Goals, enter "package", click Apply.
- JSPUI Assemble task (Assembles just the JSP-UI - useful if you only changed the JSP-UI)
- Right click on "Maven Build" section and select "New"
- Name it something like "JSPUI Assemble"
- Click the "Browse Workspace" button, and select your
dspace-jspuisub-module (or separate project). - In the Goals, enter "package", click Apply.
- XMLUI Assemble task (Assembles just the XML-UI - useful if you only changed the XML-UI)
- Right click on "Maven Build" section and select "New"
- Name it something like "XMLUI Assemble"
- Click the "Browse Workspace" button, and select your
dspace-xmluisub-module (or separate project). - In the Goals, enter "package", click Apply.
- You can also create tasks to assemble just the OAI-PMH interface (
dspace-oai) or LNI (dspace-lni) similar to those for the XMLUI and JSPUI.
After creating these tasks, you may want to add them to your "Favorites", so that they appear in your External Tools Dialog dropdown. Click back on the External Tools Dialog button, and choose "Add to Favorites". Then, add all of your tasks to your favorites!
Running Maven to Build DSpace
Just run your DSpace Assemble task, as detailed in the Defining Maven Tasks in Eclipse section above.
If you are looking at the Console view in Eclipse, you will know the build has been successful when you see it terminate with a message similar to the following:
[INFO] ----------------------------------------------------------------------------
[INFO] BUILD SUCCESSFUL org.dspace:dspace:pom:1.5-SNAPSHOT (  task-segment: [package] )
[INFO] ----------------------------------------------------------------------------
[INFO] Total time: 32 second
[INFO] Finished at: Tue Nov 27 14:17:56 CST 2007
[INFO] Memory 8M/63M
[INFO] ----------------------------------------------------------------------------
You will need to select your DSpace 1.5 Eclipse project(s), Right Click, and select "Refresh" to see the changes that this makes to each of the components. You will notice that it has inserted a new directory in every module called target which contains the result of the build process.
Under your dspace project or sub-module, you should now have a /target/dspace-<version>.dir/, which is the pre-installation package of DSpace 1.5. It is from here that we must initialize our local copy of the application for development.
Preparing Configuration
Before we do any build work, we must prepare the DSpace configuration.
- Create a <dspace> directory where you want to install DSpace on your computer (e.g.
C:\dspaceor/dspace) - Also create a
configfolder here, and copy the<workspace>/dspace/target/dspace-<version>.dir/config/dspace.cfgto this<dspace>/configlocation. - Edit this
dspace.cfgfile to contain the correct configuration for your intended DSpace installation.
The most critical things to get right are the installation path and the database path. This documentation does not cover setting up the DSpace database, but you should do this before going any further. Please refer to the DSpace System Documentation for additional instructions.
The installation path you give should be:
dspace.dir = <dspace>
where <dspace> is the absolute path of the folder where you want DSpace to be installed. Other configuration that you should ensure are set correctly are as follows (assuming installation on the local machine):
  # DSpace base URL.  Include port number etc., but NOT trailing slash
  dspace.url = http://localhost:8080/dspace-jspui

  # DSpace host name - should match base URL.  Do not include port number
  dspace.hostname = localhost

  # Name of the site
  dspace.name = DSpace 1.5
Running Ant to Install DSpace
Now, we want to create a fresh installation of DSpace. This will create our database properly, and setup the <dspace> installation location. (You only need to do a "fresh install" once! So, you can skip this, if you've already done it)
- In your
dspaceproject/sub-module, locate/target/dspace-<version>.dir/build.xml. This is the Ant build file for DSpace. - Right click the
build.xmlfile and select Run As -> Ant Build ... - Targets Tag: uncheck "compile" and check "fresh_install"
- Main Tag: In the Arguments box, insert
-Dconfig=<dspace>/config/dspace.cfg, where <dspace> is the full path of the folder where you are installing DSpace. - Hit "Run" at the bottom of the page.
If you are looking at the Console view in Eclipse, you will see it installing DSpace, and creating and preparing the database.
Configure Eclipse Tomcat Integration
You only need to follow these steps if you want to integrate your DSpace projects with the Eclipse Tomcat Plugin.
Modifying the Maven Tasks in Eclipse
In order to ensure the Tomcat Plugin can run off of the web applications within the various /target/ directories, we need to tell all of our Maven build tasks where our dspace.cfg configuration file is.
Go back into each of the Maven build tasks you defined in the Defining Maven Tasks in Eclipse section above, and add the following parameter:
dspace.config = <dspace>/config/dspace.cfg
where <dspace> is the full path of where you installed DSpace.
Note: You do not need to make this change for the DSpace Clean task, as it doesn't need to know where this configuration file resides.
Finally, reassemble all of DSpace by rerunning your DSpace Assemble task.
Configuring Tomcat Projects
If you would like the ability to perform live debugging through the Eclipse Tomcat Plugin, you will need to setup the appropriate DSpace web interface projects as Tomcat Projects.
The project properties that you would need to modify are available by Right Clicking on the project name and
selecting Properties -> Tomcat.
- For One-Big-Project Approach
- Make sure to check the option "Is a Tomcat Project"
- Set the context name to be similar to:
dspace-1_5(this context path can be anything and is what you want Tomcat to use in the URL) - You will have to choose which interface you want to debug, since only one interface is supported at a time.
- If debugging
dspace-jspui, set the web application root to be:/dspace/target/dspace-<version>-build.dir/webapps/jspui - If debugging
dspace-oai, set the web application root to be:/dspace/target/dspace-<version>-build.dir/webapps/oai - If debugging
dspace-xmlui, set the web application root to be:/dspace/target/dspace-<version>-build.dir/webapps/xmlui - If debugging
dspace-lni, set the web application root to be:/dspace/target/dspace-<version>-build.dir/webapps/lni
- If debugging
- For multi-project approaches, you can debug multiple interfaces at once. Therefore, you can set up each of the below projects to run under separate Tomcat contexts:
- dspace-jspui
- Make sure to check the option "Is a Tomcat Project"
- Set the context name to be similar to: dspace-jspui
- Set the web application root to be:
/target/dspace-jspui-<version>
- dspace-oai
- Make sure to check the option "Is a Tomcat Project"
- Set the context name to be similar to: dspace-oai
- Set the web application root to be:
/target/dspace-oai-<version>
- dspace-xmlui
- Make sure to check the option "Is a Tomcat Project"
- Set the context name to be similar to: dspace-xmlui
- Set the web application root to be:
/dspace-xmlui-webapp/target/dspace-xmlui-webapp-<version>
- dspace-lni
- Make sure to check the option "Is a Tomcat Project"
- Set the context name to be similar to: dspace-lni
- Set the web application root to be:
/dspace-lni-webapp/target/dspace-lni-webapp-<version>
- dspace-jspui
Viewing the applications in a web browser
With the stages above complete you can now start tomcat and view the DSpace applications in a web browser.
(Re)start the Tomcat web server through the Eclipse interface. This is done by clicking the right-most of the three tomcat buttons that are in the Eclipse toolbar courtesy of the SysDeo plugin. (In normal operation, you can restart the context without restarting tomcat, which can be done by right clicking on the project name and selecting Tomcat project -> Reload this context; furthermore, Eclipse will regularly auto-deploy the context while you are making changes). You can see the results of these actions reflected in the Console View if you have it open.
You should now find the web interface deployed; try one of the following URLs to see if they are working:
http://localhost:8080/dspace-jspui (JSP-UI)
http://localhost:8080/dspace-oai/request?verb=Identify (OAI-PMH)
http://localhost:8080/dspace-xmlui (XML-UI)
Viewing the Database in Eclipse
- Go to the Database Explorer View and select "New Connection" from the right.
- Use the following details to create a new database connection: Generic JDBC -> 1.0. Enter the database name dspace-svn; The JDBC driver: org.postgresql.Driver; The location of the driver will be the postgres JAR file, in dspace-svn/lib; The connection URL should be as specified in your dspace.cfg: jdbc:postgresql://localhost:5432/dspace-svn. To check that this is working hit "Test Connection". Once it is hit "Finish".
- Browse your database using the Database Explorer View: Connections -> dspace-svn -> dspace-svn -> Schemas -> public -> Tables will show you a list of the tables that Ant created during install, for example
There are lots of things you can do with the database connection, including issuing queries, so it's worth playing around with.
So what use is this really?
Well, aside from the obvious benefits of having everything compiled in the background while you are working, and having everything, including database browsing and querying integrated into your development environment, consider the following exercises:
DSpace 1.4.2
- Open the file dspace-svn/src/org/dspace/app/webui/servlet/DSpaceServlet.java
- Scroll down to the method:
 private void processRequest(HttpServletRequest request,
            HttpServletResponse response) throws ServletException, IOException
and find the line of code which reads:
  // Are we resuming a previous request that was interrupted for
  // authentication?
  request = Authenticate.getRealRequest(request);
around line 136.
- Once you have found this line, right click in the margin on the left side of the line numbers, and select "Toggle Breakpoint". A blue circle, with a tick in it, will appear.
- Go to your web browser, and select any link appart from the home page. For example, browse by title.
- Did you see what happened? Eclipse should have intervened in your web browsing, offering to open the debug mode for the application. If you agree to the request, you are flipped back into Eclipse in the Debug Perspective. You should find that the file DSpaceServlet is open, and execution of the code has ceased at the line where we set the breakpoint. From this point you can step through the code, line-by-line if you like, and see the state of all the variables and your position in the stack at whatever point you like. Now that's useful!
DSpace 1.5
- Open the file <workspace>/dspace-api/src/main/java/org/dspace/browse/Browse.java
- Scroll down to the method:
public static BrowseInfo getItemsByTitle(BrowseScope scope)
            throws SQLException
{
        scope.setBrowseType(ITEMS_BY_TITLE_BROWSE);
        scope.setAscending(true);
        scope.setSortByTitle(null);

        return doBrowse(scope);
}
around line 165 of Browse.java
- Once you have found this line, right click in the margin on the left side of the line numbers, and select "Toggle Breakpoint". A blue circle, with a tick in it, will appear.
- Go to your web browser and select the "Browse by Title" page (it doesn't matter if you have any items in your archive or not)
- Did you see what happened? Eclipse should have intervened in your web browsing, offering to open the debug mode for the application. If you agree to the request, you are flipped back into Eclipse in the Debug Perspective. You should find that the file DSpaceServlet is open, and execution of the code has ceased at the line where we set the breakpoint. From this point you can step through the code, line-by-line if you like, and see the state of all the variables and your position in the stack at whatever point you like. Now that's useful!
This example is particularly cool because the code with the breakpoint in it is in a separate project to the JSPUI, which is the application you actually loaded through the UI. By including the classes produced by the dspace-api project into the library of the dspace-jspui project, it means that we can debug across both projects simultaneously, as well as the same piece of API code accessed from multiple interfaces (e.g. OAI).
More tips and tricks
There are plenty of opportunities for this sort of integration to be useful, and I would encourage people to add their tips and tricks to this page.
Overview
Content Tools
All content on the LYRASIS Wiki is licensed under the CC BY (Attribution) license![]() , unless otherwise noted.
, unless otherwise noted.